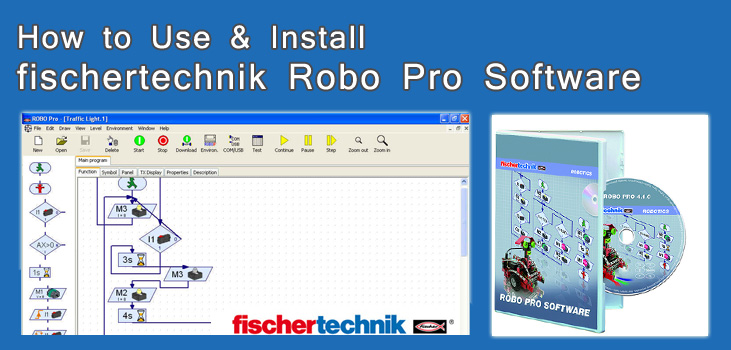
It’s no secret that fischertechnik offers a wide variety of robotic solutions for students and educators. From elementary school to higher education, fischertechnik has a versatile selection of kits that are highly customizable to suit whatever your needs may be. At the center of FT’s robotics systems is the Robo Pro software. In this post, I will talk about Robo Pro system requirements, installation procedures, and how to use it to bring your robot to life.
What Does Robo Pro Software Do?
Robo Pro is a block programming software. It can detect fischertechnik Robotics controllers, such as the Robo TXT or the Robo TX Controllers, via USB connection. You can write programs in Robo Pro and then send them to the controller for execution. Robo Pro is the quickest and easiest way to create functionality for your robot.
System Requirements
As with any software, the first step you should take is to familiarize yourself with the system requirements and make sure the software will run on your computer. fischertechnik does not offer a detailed system requirements information for Robo Pro. However, they do state that it is compatible with Windows XP, Vista, 7, 8, and 10. As for hardware requirements, none are listed on FT’s website. Considering the nature of the program, it’s safe to assume that the hardware requirements are minimal. Considering that the software can run on a Windows XP machine, it’s a safe bet that any computer built within the last ~15 years can probably run this software assuming the machine has a compatible OS.
Installation Instructions for Robo Pro Software
First things first, download the software. Download the Robo Pro Software from that website under the “Robo Pro Software” section. If you have purchased Robo Pro, then you likely got a physical copy of the software that comes with a CD. If you purchased Robo Pro and you don’t have a physical copy, then you will want to download it from the above-referenced site. I will be downloading the “Demoversion ROBO Pro Software Englisch” file from the website.
- Once the file is downloaded, it will need to be extracted since it is a .zip file. Right-click on the downloaded file and choose “Extract files”. Follow the on-screen instructions to extract the files.
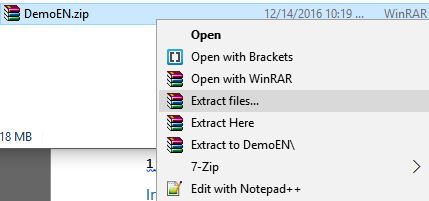


Mine may look a little different because I have WinRAR and 7-zip installed.
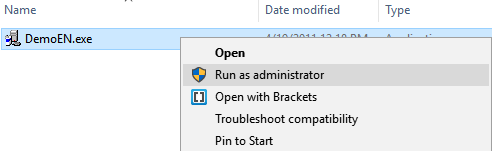
- Once the file is extracted, a folder should open with the installation file in it. Right-click on this file and choose “Run as Administrator”.

- Click “Next” several times and accept the license agreement when it asks.
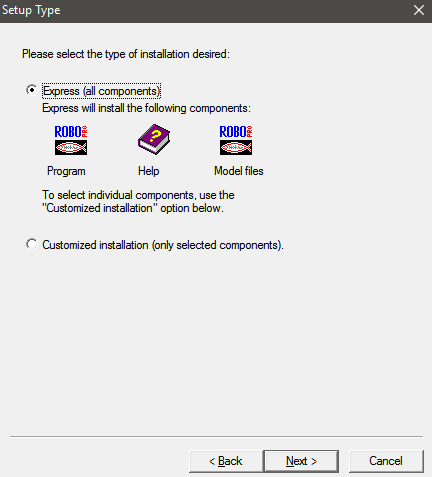
- You will then be asked to select the type of installation you want. I recommend using the “Express” option, which will install the software, the help documentation, and the model files. If you want to customize your installation, choose “Customized Installation”, which will let you choose which components get installed. I’m going to do “Express Installation”.

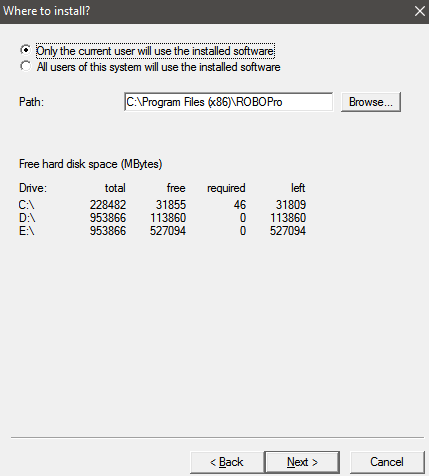
- The next window will ask you where you want to install the software to and who has permission to use it. In general, you can leave these settings default and click “Next”.

- Lastly, click Finish and let the software install.


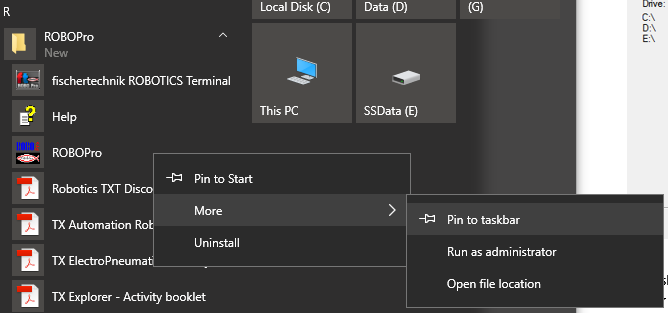
The software should be installed at this point. Windows 10 does not seem to create a shortcut to the software after it’s installed. I noticed this happen on my computer. I ended up finding Robo Pro in the start menu. Once you find it, you can right-click on it and pin it to the taskbar for easy access.

How to Use Robo Pro Software
Instead of outlining the basics using text, I’ll refer you to this video I made a while back that shows how to build an incredibly basic program in Robo Pro. This video exists to convey the general idea of block programming and the fundamentals of Robo Pro. From there, you can build larger, more complex programs. (Skip ahead to 2:42 for the demonstration).
Conclusion
Hopefully, this post helped you know where to download, how to install, and how to use Robo Pro. I do want the emphasize that no matter what kind of robot you make, Robo Pro can be used to give it functionality if you have a compatible controller. If you familiarize yourself with the software, you will be able to make anything you want.
Be sure to check out fischertechnik kits, controllers, fischertechnik spare parts, classroom solutions from fischertechnik Education, and more at www.studica.com. Thanks for reading!
Blogger: Mark Philipp, Application Engineer at Studica
Share this Post