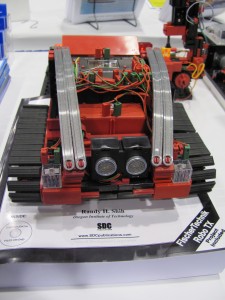
This week our amazing interns worked with many fischertechnik robotics kits. If you haven’t heard of them, fischertechnik is a company provides robotics kits for students of all ages to learn how the things around them actually work. The 3 different models that we built at Studica this week were:
- Pinball machine
- Ball Obstacle Course from the New ROBO TX ElectroPneumatic Kit
- Robo TX Explorer
 The Robo TX Explorer was an extraordinary robot model with a variety of motors and sensors. With these extras it required more programming than we had originally anticipated. We needed to include the various sensors on the robot such as the ultrasonic, colour sensor, and line sensor. All of the programming was done through the use of RoboPro which is a Graphical Programming Language.
The Asteroid AG5 Challenge
This challenge is very similar to the FLL challenge but with the use of fischertechnik products and software. The robot is to start off at one of the bases in the corner of the border and is to then travel towards the specified purple spots without going over the obstacle which is the brown surface. Plus, there are the power zones which are spread out around the board these zones could either increase or decrease the power to the motors of the robot.
Programming the robot to drive through the obstacle course was tough. We began by trying to program the drive to maneuver through the mat by using a time delay. This method was really just trial and error, determining how long it would take for the robot to reach a certain destination. After having estimated the time we would run the robot and see if it would make it to the objective. As we explored this method we realized that it produced very poor results and that an increase or decrease in the power supplied to the micro controller would lead to the robot taking less or more time to reach the objective than we had specified in the program.
Then we decided to begin incorporating some sensors. We began to use the ultrasonic sensor and found that it was very useful; being able to specify a certain distance that is to be traveled as opposed to the time of travel allowed for the robot to produce the same results regardless of low or high power supplies. It also allowed us to be more accurate with our movements. With the awesome results displayed by using the ultrasonic we decided to use it throughout the rest of the program. How it works is that we have the mat placed inside of a rectangular box with boundaries and the distance to be traveled is determined by the distance from the current position of the robot to the boundary directly ahead of the sensor. We then place the robot in the new position we want it to go to and check the ultrasonic readings from there. Within the program we have an analog branch set to distance sensor and would then specify what distance should be sensed by the ultrasonic from where it would carry on to the next part of the program; that would be the condition. If the condition is false then it would run through a subprogram until the condition is met.
We also built the Ball Obstacle Course from the ElectroPneumatic Kit. It was easy to build because the lowest age required to build this was 10 years old and the programming was straightforward. The two kits are meant to be automatic so, with the vacuum arm we decided to turn the base of the arm to the location of ball using phototransistors at each of the end points of the course to tell the arm where to turn and pick up the ball.
I did have a few problems with the ball obstacle course. First, I had problems with the arm going down too fast on the ball causing the ball to jump out of the arm. We did a temporary fix by adding tension to the arm using a rubber band causing the arm to drop much slower to catch the ball. Second, I had problems with the amount of suction given by the pneumatic pumps. The suction given was not enough to lift the ball so we tried adding 2 pneumatic cylinders to increase the power of the suction but that only held the ball for a second.
Next was the Pinball machine. It was a lot simpler than the explorer. Assembling the machine was very straight forward and had no issues at all. By the time I had completed assembling the machine it looked amazing. Programming the machine was also very easy when compared to the robot. It took no more than 10 minutes to create a simple program that would run the machine. There were two switches that would trigger either the left or the right flipper which were controlled by the pneumatic pistons connecting back to the air compressor. And we had a photo transistor which was set up at the bottom of the pinball machine where the ball would go if the flippers missed the ball. As the ball passes through it would block the light to the photo transistor notifying the controller that the ball had gone through and that the player had lost.
Share this Post
