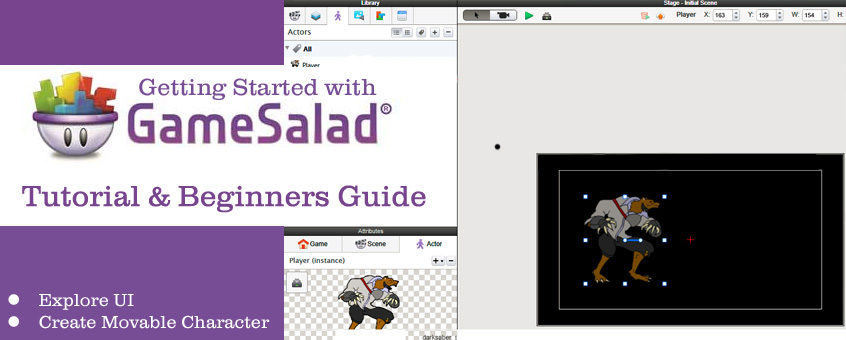
If you’ve heard of GameSalad, but aren’t quite sure what it is we’ve put together this handy tutorial. Explore this easy-to-use 2d game development software and follow along with this introductory GameSalad tutorial we’ve put together. Learn the basics, review the user interface and discover how to create a movable character. This article will get you familiar with the software and how GameSalad functions. Education discounts on GameSalad are available for schools, educators, and students at Studica.com.
What is GameSalad?
GameSalad is a 2D game-making software. Create fully functioning 2D games that can be built onto a variety of platforms such as PC, Mac, Android, iOS, and more. GameSalad is used in education as an introductory tool for game development because it is incredibly easy to learn and use. The most significant feature of GameSalad is that you do not write code to make things happen in your game. This separates GameSalad from more complex game engines such as Unity 3D. While Unity may be a more powerful engine, it has a steeper learning curve. Unity also requires C# or JavaScript programming to really make things happen. If you have a simple 2D game idea, you can more quickly and easily bring that idea to life using GameSalad versus more complex engines.
Getting Started
Once you have GameSalad downloaded, go ahead and install it. The installation process is straightforward. Open the wizard, click Next a bunch of times, and you should be good to go. Once it’s installed, go ahead and open the program. There should be an icon on your desktop that looks something like this.![]()
![]()
Terminology
- Scene: A scene in GameSalad is, essentially, a level. Think of any video game you’ve ever played. Chances are, they have different levels as you progress through the game. Each level has its own unique map, enemies, and challenges. A scene is really no different. You can create any number of scenes you want for your game. Each one can contain anything you want. Your players will then interact with these scenes that you create.
- Actor: An actor is basically an object that you can put into your scene. An actor could be a playable character, an AI-controlled enemy, an environmental obstacle such as a gigantic rolling rock, and much more. Basically, anything that you put into a scene becomes an actor. Even a brick wall can be an actor.
- Attributes: Attributes are values that are associated with the game as a whole, individual scenes, or specific actors. Attributes can be modified, removed, or added to the game, a scene, or an actor. Examples of a game attribute would be Display Size, which is the size of the screen for your entire game. A scene attribute would be the amount of gravity in a scene. An actor attribute could be something simple like hit points for your playable character. Attributes play a huge role in the functioning of your game. You will often modify and add attributes as needed in order to get the desired behavior in your game.
- Layers: Anybody who’s used any sort of image editing software is probably familiar with the idea of layers. In 2D applications, layers are a way to tell your software which images to render in front of or in back of other images. For instance, you might have a “Player” layer and a “Background” layer. Your background layer can be setup to be rendered behind your Player layer. Anything on the player layer will be rendered on top of anything that is on the background layer.
- Behaviors: These are the cogs that make your game function. Behaviors are what you will likely spend most of your time on in GameSalad. They are used to dictate the logic of your actors. Behaviors are, essentially, the “code” of GameSalad. They consist of rules and conditions that allow you to give your actors functionality. For example, you might have a playable character that you want to move using the arrow keys on your keyboard. You can use a “Rule” block to check a key press “Condition”, which will then execute a “Move” behavior if the proper key is pressed.
GameSalad User Interface
The GameSalad UI might look confusing at first glance. But after a few minutes with the software, you’ll begin to understand it.
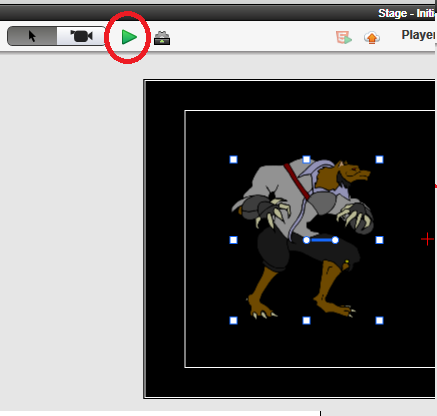
The Stage
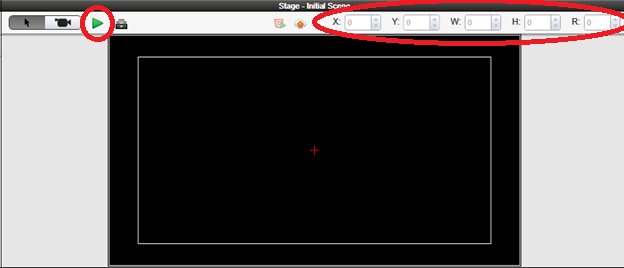

The stage is basically what your game looks like. This is where you drag and drop items into your game. The Stage also serves as a camera. Your game is rendered in this section. When you play your game, it is played using this part of the UI.
The Green button circled in red is the play button. When you press this, your game will play. This allows you to test the things that you’re implementing. The X, Y, W, H, & R values (at the top right of this section, circled in red) are values that can be used to manipulate positions, dimensions, and rotations of objects in your scene.
The Backstage
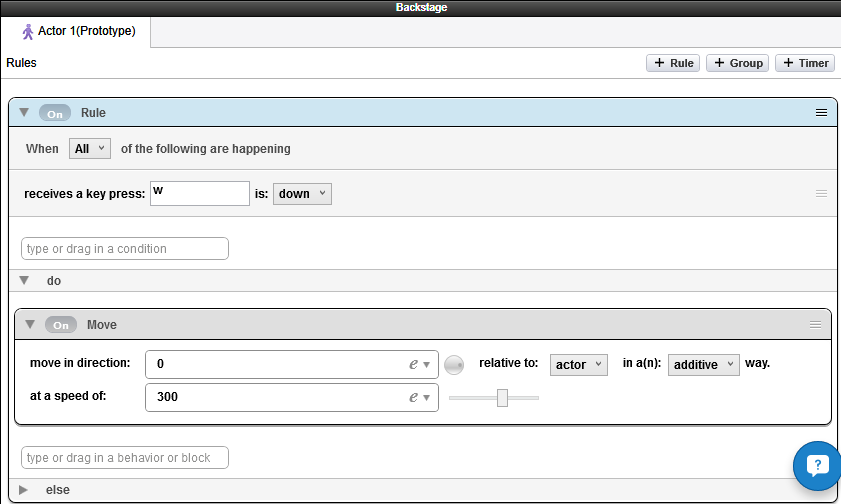

The backstage is just below the Stage. The backstage is where you use behaviors to create functionality for your actors. In the above screenshot, I am modifying the rules of an actor. All of the behaviors that an actor has will be displayed in the backstage when that actor is selected.
Attributes
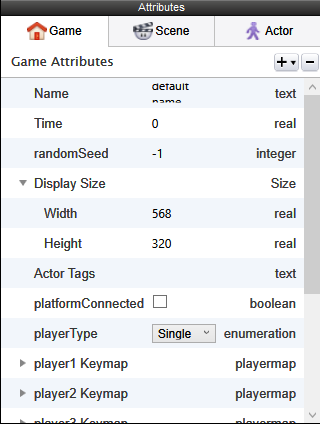

The attributes section is where you can add, delete, or modify the attributes for your game, scene, or actor, as described in the “Attributes” terminology section earlier in this post. Click on each tab to see the different attributes associated with each item. You need to have an actor selected to see the Actor attributes for that actor. It’s worth noting that Actor attributes only apply to the actor that you have selected at the time.
Library

The library is where all your assets can be found. The library can contain assets that are not even within your scene. The tabs across the top of the library section allow you to access different types of assets.
Here’s what each tab is from left to right:
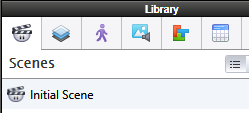
♦ Scenes: All the scenes you’ve created in your game are stored here. You can double-click on any scene to open it up and modify it.
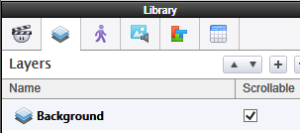
 ♦ Layers: The Layers library is a list of all the layers in your game. You can move them around, remove, add, or modify them as needed.
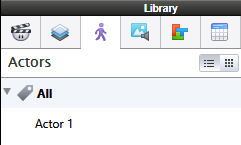
 ♦ Actors: The Actors library is a list of all the actors in your game. You can add, remove, and modify actors here.
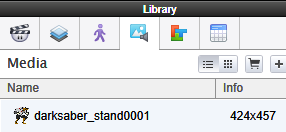
 ♦ Media: The Media library is a list of all the media assets in your game. This can include audio files, image files, and more. These assets can then be used in your game as sprites, sound effects, and more.
 ♦ Behaviors: The Behaviors library shows you all the behaviors that are available for use in the backstage. You can click on each item to get a definition of the behavior. This can be helpful in understanding what each behavior can do for you.
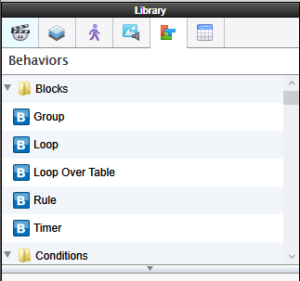
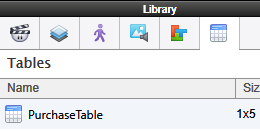
 ♦ Tables: The Tables library shows you a list of the tables you have in your game. Tables can be used to pull and write data to in your game. You can utilize functions much like you can in Microsoft’s Excel to manipulate and use the data in a very dynamic way.

How to Create a Movable Character in GameSalad
Now that we have the general information out of the way, let’s make a character that we can move around on the screen. We’ll used the WASD keys to move the character around. W for up, S for down, A for left, R for right.
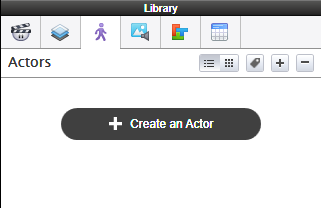
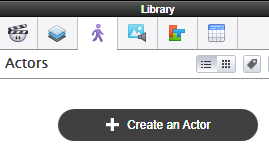
- Go to the Library at the top-left of the program and click the “Actor” tab (the one with the person icon on it) and click “Create an Actor”:

- Double-click on the “Actor 1” name that shows up in the library window and change the name to “Player”. Press Enter when you’ve done that.
- While you have the actor selected in the library, go to the attributes section at the bottom-left of the program and click the “actor” tab:
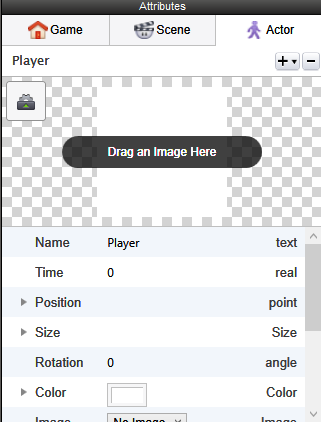

- You don’t have to do this, but we are going to add an image to the actor. I downloaded a sprite from a free game sprite website. You can find an image that you want to use or you can just stick with the default white square for the character. Go to your media library and click and drag the image you want to use onto the attributes section that says “Drag an image here”:
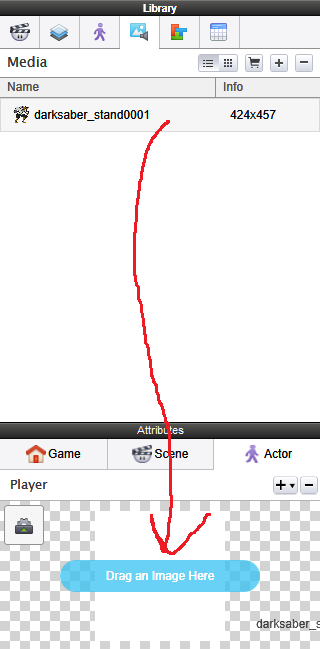

- This gives the actor a sprite to use so it looks like something other than a white square. By default, the actor will look like a white square.
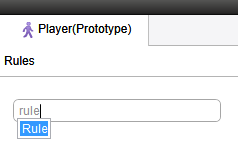
- Now, we want to give behavior to our actor. Make sure the actor is selected in the library under the “actor” tab and then take a look at your backstage. In the backstage, left click inside the text box that says “type or drag in a behavior or block”. Type “Rule” and choose the “Rule” option that comes up:

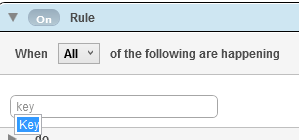
- Inside the rule, there’s another text box. Click in it and type “Key” and choose the “key” option that comes up:

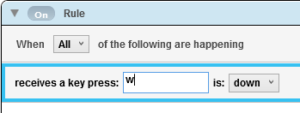
- A “Receives Key Press” item shows up. In the empty text box, put “w” in the field and make sure the drop down box is set to “down”:

- Expand out the “Do” section of the rule. Click the text box inside the do section and type “move” and choose the “move” behavior.
- On the move behavior, make sure it has these options:
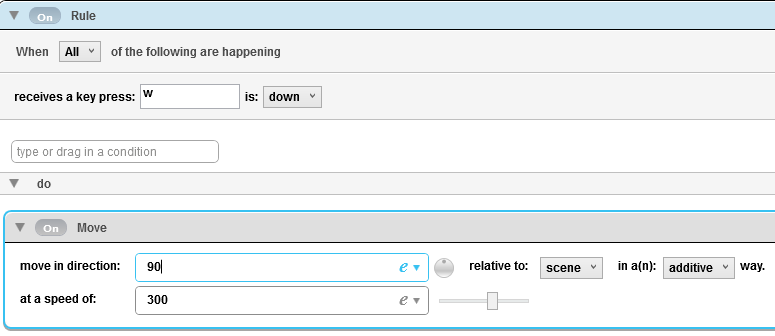

- The direction of 90 is straight up. The direction in GameSalad is based on a standard, 4-quadrant graphing system that you would normally find in Geometry or Trigonometry. In such a system, 90 degrees is straight up, 180 is left, 270 is down, and 0 is right. You can also use the circular dial to the right of the text box to choose direction. You’ll notice it’s pointing straight up when we choose 90. We choose relative to: scene because we want the actor’s upward direction to always be based on the scene’s upward direction. Depending on what you’re doing, you will sometimes use relative to scene and other times use relative to actor. The rest of the options in our move behavior will stay default.
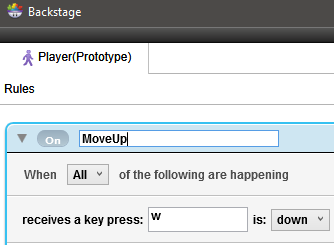
- Let’s rename the rule by double-clicking on the “Rule” title and changing it to “MoveUp”.

- Now, let’s create our other movement rules. Since we’ve already made one movement rule, our other movement rules will be very similar. We can save some time and copy the rule we just made 3 times. On Windows, you can do this two ways.
- You can either hold ALT + click and drag the rule to a section below it.
- Or you can select the rule, click CTRL + C to copy and then CTRL + V to paste the rule.
- Once you have the rule copied three times, you’ll have a total of 4 rules in your backstage. I’m going to rename each rule right off the bat to avoid confusion. I end up with MoveUp, MoveDown, MoveRight, and MoveLeft rules.
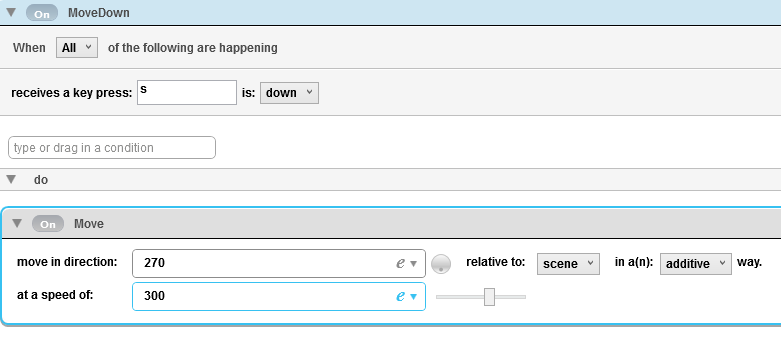
- Now, let’s modify each rule. Go into the MoveDown rule and change the key condition to S and the movement direction to 270.

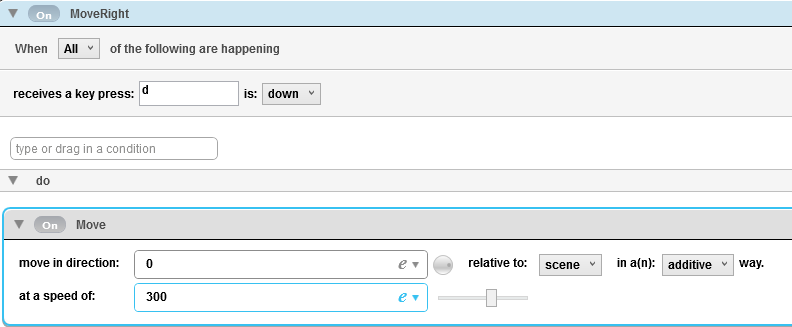
- Let’s do this for MoveRight now. Open the MoveRight rule and modify it so it looks like this:

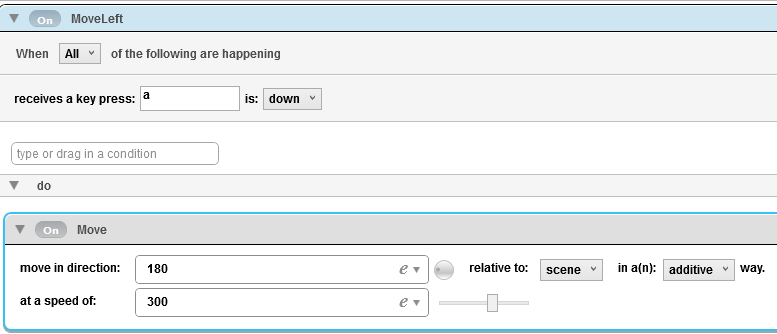
- And, finally, our MoveLeft rule:


Let’s Test the Actor!
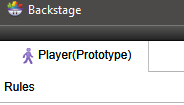
At this point, we can bring the actor into our scene and test our game and we’ll be able to move in four directions. One thing to notice before we do this is in our backstage, we’re modifying our Player(Prototype)

A Prototype is like a root actor that all instances of this actor will reference. This will make more sense once we actually put our actor in our scene. So, go ahead and open the Actor tab in the library and drag the Player actor onto the stage:
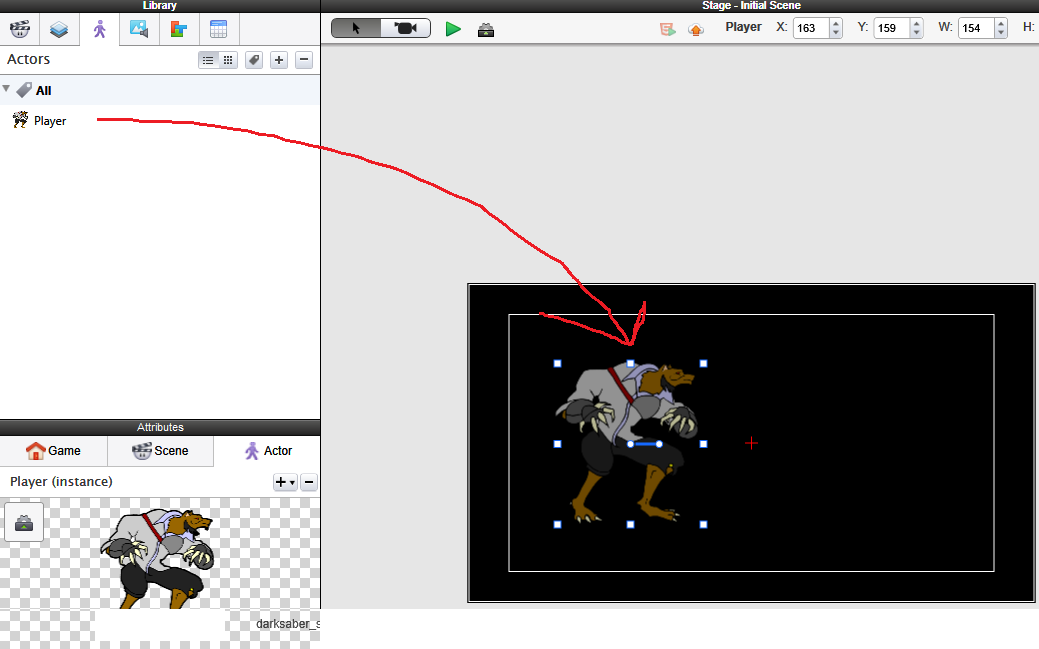

You’ll notice, if we have our actor in our stage selected, that the Actor Attributes section and the Backstage will now show an area for “Player (Instance)”. An instance is basically a copy of the actor prototype. Any changes you make to the instance will NOT be made to the prototype. However, any changes made to a prototype will be made to all instances of that prototype. So, for example, if we changed the color of our instance so that it was transparent, the prototype would NOT become transparent. You could drag another copy of the Player into the stage and it would NOT be transparent. Only the instance that you made transparent would be transparent.
Now that our actor is in our scene, let’s go ahead and press the play button.

Once your game is playing, use WASD to move your character around on screen. If you did everything right, your character should be moving. If it’s not moving, look at my above directions again and make sure you followed them closely.
Conclusion
Currently, our game is not too impressive. But the point of this post was to serve as a basic introduction. Hopefully, you better understand GameSalad and how to use it. There is a lot more that you can do to make your game come to life. Moving a character is one of the absolute basics of game development in GameSalad. In the coming months, I will write more pieces about accomplishing things in GameSalad such as collision detection, score keeping, particles, and more.
Education Discounts on GameSalad
Get a student discount on GameSalad Creator Pro that can save you up to 50% (faculty is also eligible). For classrooms and schools, GameSalad STEM Bundles for Education are also available at Studica. Learn more about these comprehensive STEM offerings.
Blogger: Mark Philipp, Application Engineer at Studica
Share this Post