I had a question come up recently from a colleague about auxiliary views in Revit. Up front, I had no idea how to accomplish this. I browsed around the internet and noticed quite a few people asking but nobody really had a solution. I found somebody who proposed using reference planes to create an auxiliary view. I decided to try and tackle this issue and came up with a solution that I have detailed step-by-step below. Note that I used Revit Architecture 2010 for the below instruction. Many of these steps should be nearly identical in newer releases.
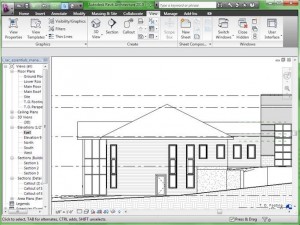
First of all, open up an Elevation View of your sloped roof from the East or West:
Under the Home Tab, go to the “Work Plane” ribbon and click the “Reference Plane” drop down and choose “Pick Existing Line or Edge”:
Pick an Offset of about 2’ or however much you want and click on the sloped roof and make sure the projected reference plane shows above the roof and then click to place a new reference plane:
Next, press escape and left click on the reference plane then go to “element Properties”. In the Element Properties Window, under the Name field, give it a name. For this example, I will call it “Auxiliary”. Press OK.
Now, go into a 3D view. You can create a new 3D view if you want. In the 3D view, go to the “Work Plane” ribbon under the Home tab and click the “Set Work Plane” button.
In the window that comes up, under the “Specify a new Work Plane” section, make sure “Name” is selected and from the drop-down, choose “Reference Plane: Auxiliary”. Press OK.
N ow click “Show Reference Plane” under the “Work Plane” ribbon:
Next, open up the Steering Wheel by pressing shift + w. Click the little arrow near the bottom-right of the steering wheel and click “Orient to a plane…”. NOTE: In 2011 and newer releases, apparently you can simply right-click the ViewCube and choose “Orient to Plane” instead of bringing up the Steering Wheel.
In the window that pops up, choose “Reference Plane: Auxiliary” from the drop down and click OK.
This will orient your 3D view to the reference plane, which should be perpendicular to your sloped roof if as long as you setup the reference plane properly. You can resize the reference plane if it’s too large by clicking on it and dragging any of the 4 blue dots:
If you narrow it in more and orient to the plane again, it should zoom in closer. You can also rotate it if necessary. If you want to isolate the roof by itself then you will need to make sure you override all the graphics except for your roof in the 3D view.
And that’s how you can do a proper auxiliary view in Revit. If you have any recommendations or suggestions, feel free to comment and discuss. Thanks!
If you are looking to purchase Autodesk products [click here]
Author: Mark Philipp
Share this Post


