National Instruments recently released LabVIEW 2018. This guide will walk you through the steps for downloading and installing the product. Note: This guide is for Windows users only. NI LabVIEW is compatible with Mac and some Linux distributions, but they will not be covered in this guide.
NI LabVIEW 2018 System Requirements
First, you’ll want to make sure your computer can run NI LabVIEW 2018. Refer to the below table to see the system requirements:
| Windows | ||
| Run-Time Engine | Development Environment | |
| Processor | Pentium 4M/Celeron 866 MHz (or equivalent) or later (32-bit) Pentium 4 G1 (or equivalent) or later (64-bit) | Pentium 4M (or equivalent) or later (32-bit) Pentium 4 G1 (or equivalent) or later (64-bit) |
| RAM | 256 MB | 1 GB |
| Screen Resolution | 1024 x 768 pixels | 1024 x 768 pixels |
| OS | Windows 10/8.1/8/7 SP1 (32- and 64-bit) Windows Server 2012 R2 (64-bit) Windows Server 2008 R2 SP1 (64-bit) | Windows 10/8.1/8/7 SP1 (32- and 64-bit) Windows Server 2012 R2 (64-bit) Windows Server 2008 R2 SP1 (64-bit) |
| Disk Space | 620 MB | 5 GB (includes default drivers from NI Device Drivers DVD) |
Overall, these requirements are not high. If you have a computer that was made in the last 5-8 years, you should be fine. Regardless, it’s important to verify your hardware to be sure you can run the software before purchasing it.
You can find more detailed system requirements for LabVIEW and add-on modules on the system requirements page from NI.
Downloading the Software
You can download the software from this page.
On that page, you’ll see two options listed. Click the link that says “I am a current user of LabVIEW Development System”. NOTE: If you do not see these options, you may need to login to the website by using the Login option at the top-right of the page.
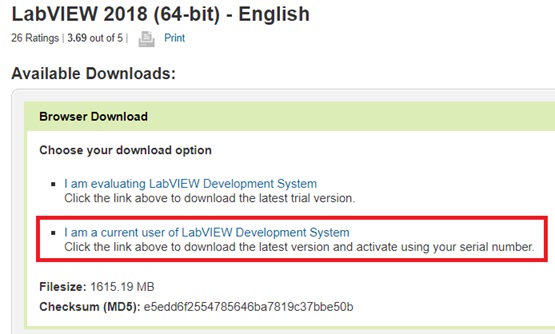
Once you click on the link, you might be asked what your current version of NI LabVIEW is. If you are asked this, choose “LabVIEW 2017” from the drop-down. Click “Continue” once you’ve selected LabVIEW 2017 from the drop-down. Additionally, if you are not signed into your user account, you will be asked to sign in. If you do not have an account, you’ll want to make an account.
If you had to sign into an account, you will be taken back to the page shown in the screenshot above. Now, when you click “I am a current user of the LabVIEW Development System”, your download should begin. Wait for the download to finish.
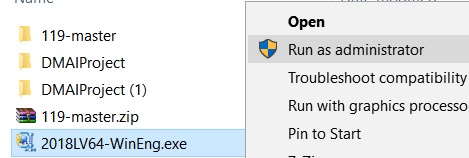
Once the download is done, navigate to where your downloads are and right-click the newly downloaded file and click “Run as Administrator”.
Upon clicking “Run as Administrator”, a window will come up, stating that the file is a self-extracting archive. Click “OK”. Another window will open, asking you where to save the installer. Leave the settings default and click “Unzip”.
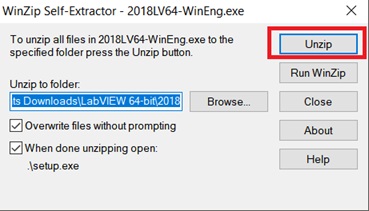
The archive will begin extracting the files to your computer. This process can take several minutes depending on your computer. Just wait for it to finish.
Once it’s finished, it will tell you it extracted the files. Click “OK” and the installer will open.
The Installation Procedure
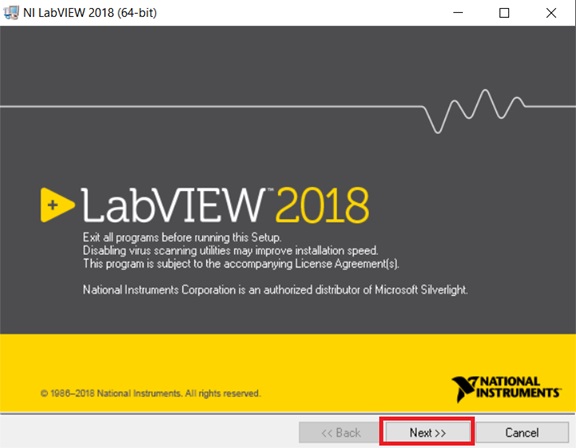
Once the installer is open, click “Next”. The installer should have opened by itself after the previous step.
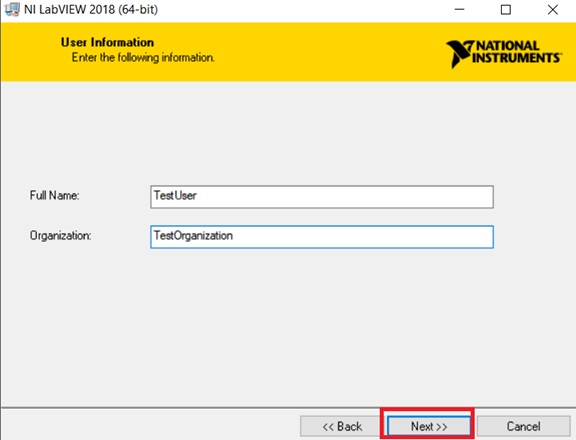
On the next window, fill out your name and organization and click “Next”. NOTE: This information is information pertaining to YOU. Do not just copy the information from the below screenshot.
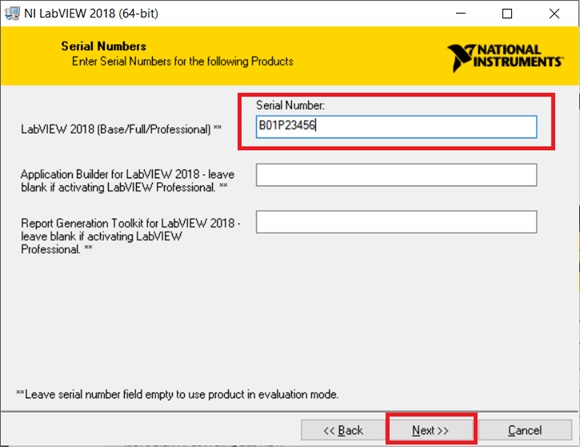
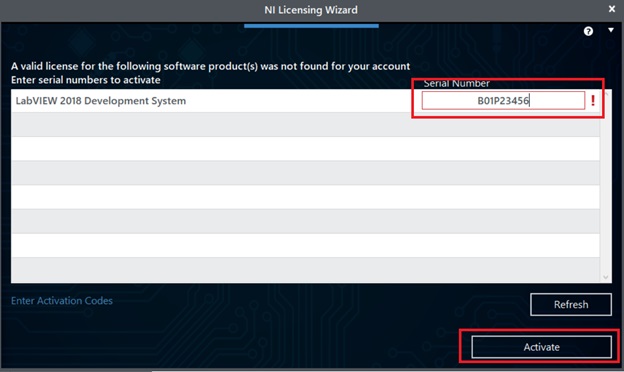
Next, you will be asked for your product serial #. If you purchased a digital copy from Studica, you will have been sent your serial #. It will look something like this: B01P23456.
If you purchased a physical copy, then the serial # should be located somewhere on the packaging. Typically, it is attached to a sticker on the sleeve the DVD came in. If you don’t see it there, thoroughly check your package for a serial #. If you do not have a serial # and you purchased from Studica, contact us and let us know. We’ll do our best to resolve your issue.
In the “LabVIEW 2018 (Base/Full/Professional)” section, put your serial # into the white box. If you received serial #’s for the other products listed, put those numbers into their appropriate boxes.
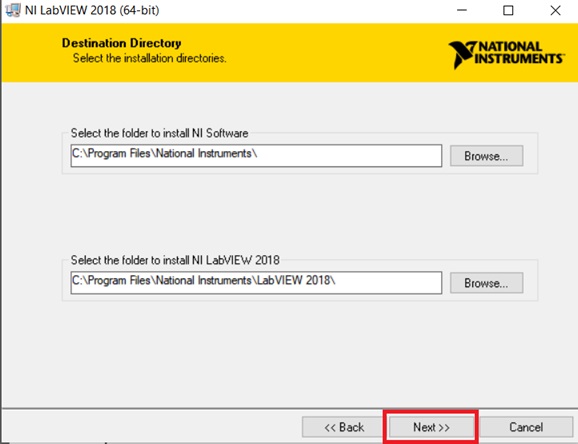
The next window will ask you where you want to install the software to. Leave these options default and click “Next”. It’s only recommended that you change the default directory if you are an IT administrator or somebody who is very familiar with computers and Windows. There can be serious issues with the software if it is not installed into the proper directory.
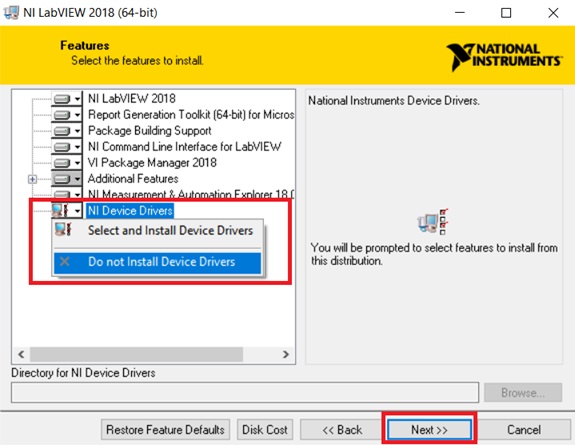
On the next window, you will be asked which features you wish to install. Click the drop-down arrow next to the “NI Device Drivers” option and choose “Do Not Install Device Drivers”. We do this because this installer does not include these drivers. If you have a MyDAQ, you will want to download the drivers separately.
On the next window, leave the check box checked and click “Next”.
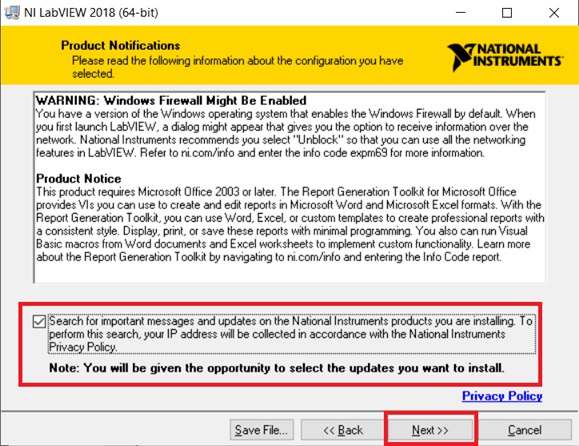
The installer will search for updates. Usually, it will tell you there were no updates found. Click “Next”.

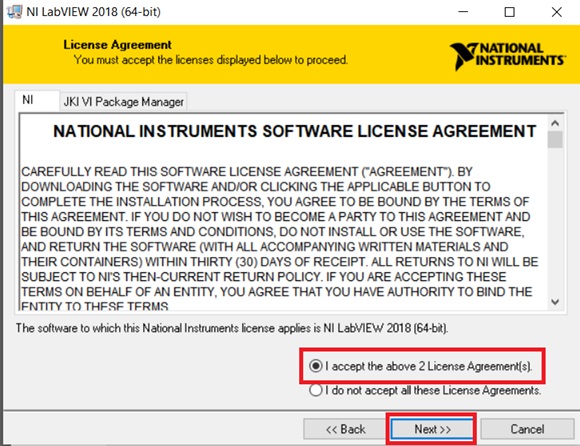
Next, you will be asked to agree to some license agreements. Choose the “Agree” option and click next.
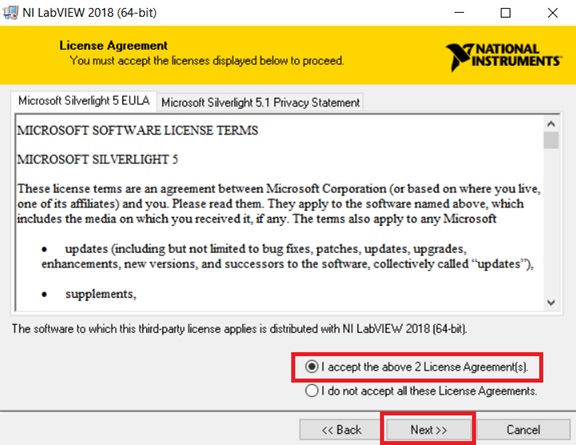
Next window will ask something similar. Choose to accept and click “Next”.
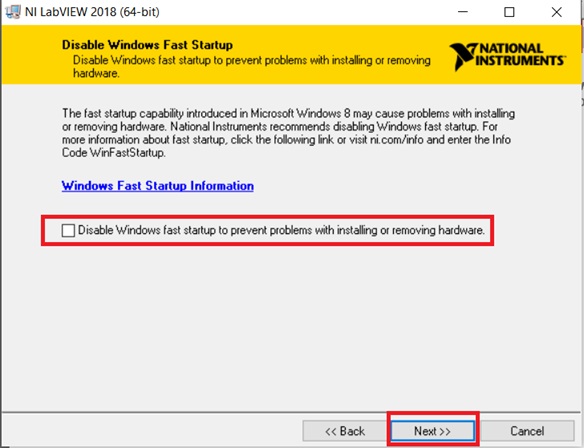
On the next window, I recommend unchecking the box to prevent Windows fast startup. I have never had an issue arise from Windows fast startup being enabled. None of our customers have ever had an issue either.
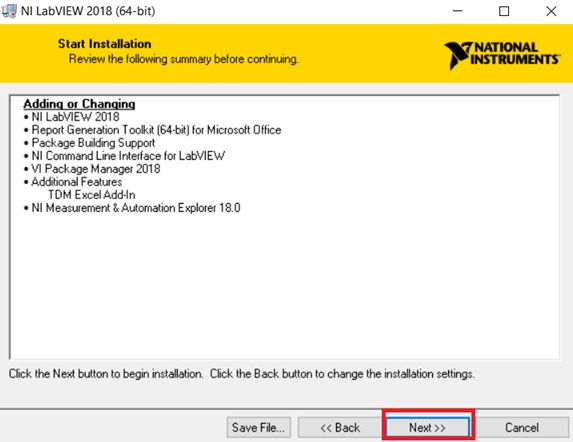
Now, you will be shown a review of what you will be installing. Click “next” to begin the installation.
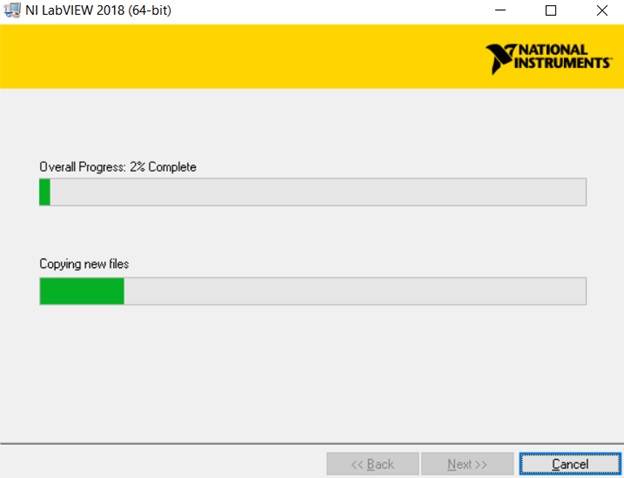
The software will begin to install. How long this takes depends on your computer hardware. It could take a few minutes to a few hours, depending on your hardware. Be patient.
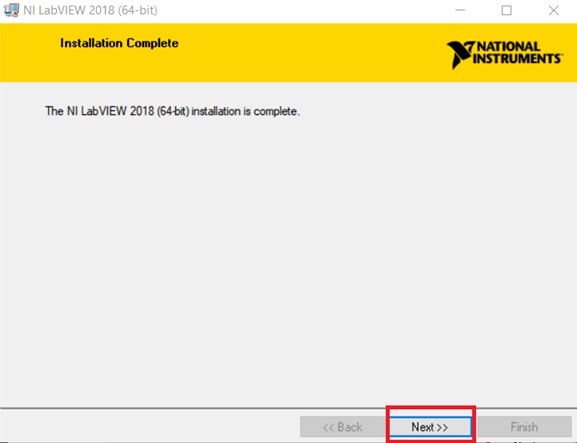
Once the installation is complete, click the “Next” button
Licensing: Activate Your Software
Once you click “Next” to exit the installer, the license manager will open for activation. You must be connected to the internet to activate.
You’ll be asked for your NI LabVIEW 2018 serial number. Go ahead and put it into the white text box. If you put the code in during the installation procedure, your code should already be filled out. Once it’s in the box, click “activate”.
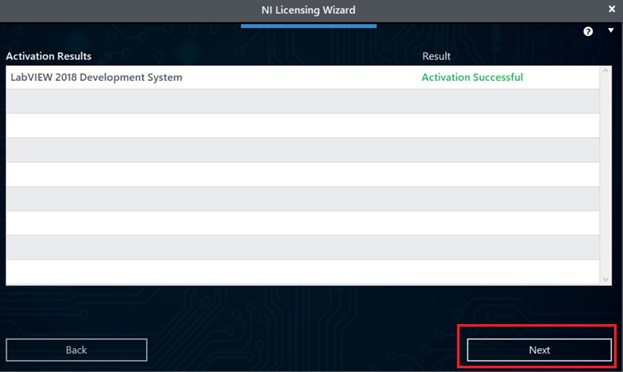
The wizard will contact National Instruments’ servers and attempt to activate. If all goes well, it should tell you the activation was successful. You can now close out of the license manager.
At this point, you will be asked if you wish to receive periodic updates from NI. It is up to you if you wish to do so or not. Choose the option you want.
You will then be asked if you wish to restart your computer. It is recommended that you restart your computer before trying to use the software.
Opening NI LabVIEW
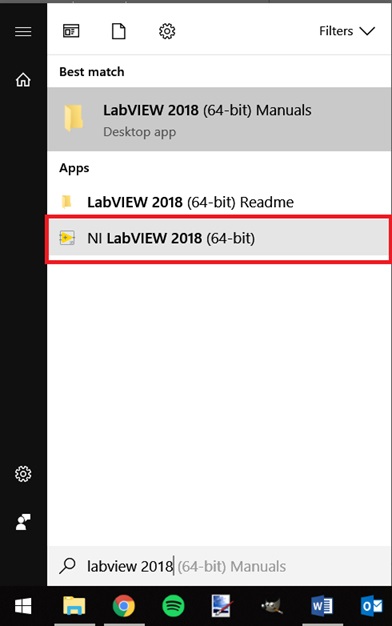
Now that the software is installed and activated, you’re ready to use it. You should have an icon on your desktop for LabVIEW 2018. If you do not have this icon, then open your start menu and type “labview 2018”. The LabVIEW 2018 application should show up. Click on this application to open it. You can also right-click on the application and choose “Pin to Taskbar” if you want to create a shortcut on your taskbar across the bottom of your screen.
Once the program is open, you are good to go!
Share this Post