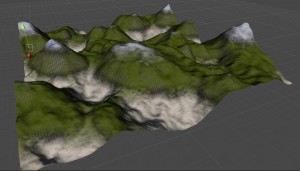
I’ve recently been learning my way around Unity 3D and found out about the Terrain Toolkit just the other day. For those who do not know, Unity 3D is a game development software that utilizes the Unity game engine. According to the Unity 3D webpage, “The Terrain Toolkit is an integrated set of tools for the Unity 3D Editor which is designed to streamline and improve the workflow involved in creating realistic terrains for games.”
 First of all, Terrain in Unity 3D is used as the 3D model which your character moves upon and interacts with the environment. Essentially, terrain is your “level”. Unity 3D has the ability to create terrain simply by clicking a couple of buttons, but the Terrain Toolkit allows you to generate very detailed, realistic-looking terrain. Unity 3D has lots of built-in functionality for terrains but the Terrain Toolkit really takes it to the next level.
To get started using the Terrain Toolkit, you must first have Unity 3D installed. Unity 3D is free for the normal version but you do have to pay money for the pro version, which comes with extra features. Luckily, the terrain toolkit works for both the normal Unity 3D and the Pro version. To download Unity 3D, go here. Download and install the software. Once it’s installed, go here to download the terrain toolkit. Once it’s downloaded, unzip the folder to a location of your choosing. The folder can go anywhere on your machine. Within the folder, there is a file called TerrainToolkit_1_0_2.unityPackage. This file is the package which you will need to import into your Unity 3D project in order to utilize the Terrain Toolkit. If you are not very familiar with Unity 3D, a package is basically a bunch of assets that get added to your Unity 3D workspace that you can use to modify Game Objects. The Terrain Toolkit does exactly that by allowing you to add the toolkit to a Terrain Game Object. A Game Object in Unity 3D is a point in 3D space that can have assets attached to it to give it shape, light, textures, meshes, etc. It’s basically the fundamental building block of everything you see in your game.
Once the folder is unzipped to a location of your choosing, then you will want to go ahead and open Unity 3D and create a new Project, or, if you already have a project, just go ahead and open up a new scene. Either of these actions can be done by going to the “File” menu. Now that you have a new scene open, the easiest way to bring the Terrain Toolkit into your project is to click the “Assets” menu → “Import Package” → “Custom Package…” → On the Windows Explorer menu that comes up, browse to the location you unzipped your folder to and double-click the TerrainToolkit_1_0_2.unityPackage file. This will import the Terrain Toolkit into your project. Now you should see “Terrain Toolkit” listed under your “Project” tab within Unity 3D.
You will notice in my screenshot that the Terrain Toolkit is listed under the “Import Package” menu item. If you want the Terrain Toolkit to be listed under the “Import Package” menu, you will have to move the TerrainToolkit_1_0_2.unityPackage file to C:\Program Files (x86)\Unity\Editor\Standard Packages or C:\Program Files\Unity\Editor\Standard Packages for non-64-bit systems. This will clump it in with the other standard packages that come with Unity 3D, which should make it available from your “Import Package” menu item.
Now your Terrain Toolkit has been added to your project. You are now ready to utilize it to make some awesome terrain for your game. I will not go into all the specifics in this blog post, but I have embedded the Terrain Toolkit tutorial video onto this post, which does a wonderful job of getting you familiar with how to use the Terrain Toolkit. You can also look at the Terrain Toolkit documentation, which has lots of great information about every function of the Terrain Toolkit and what every setting does for every algorithm.
Author: Mark Philipp
Share this Post
