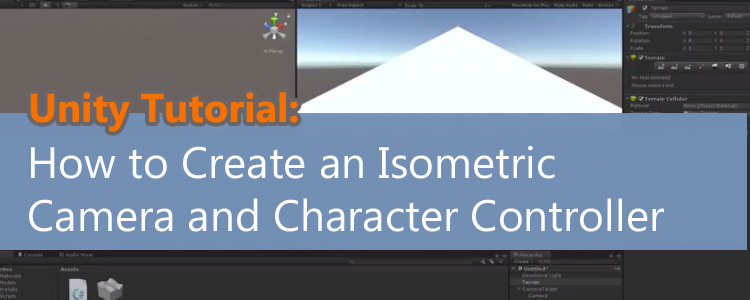
In this post, I will provide step-by-step instructions on how to create a simple isometric camera and character controller in Unity. By the end of this tutorial, you should have a simple 3D character that you can move around in an isometric scene using the WASD keys on your keyboard.
What is an Isometric Game?
An isometric game is one that utilizes an isometric point of view for the camera. Some popular examples would be games like StarCraft, Diablo, Torchlight, Bastion, or Transistor. Essentially, the camera looks at the world with a 45-degree angle of rotation, from an overhead perspective.
Why Use an Isometric Camera?

 In my opinion, there are mostly three reasons why you might use an isometric camera. The first reason is for the style. Having an isometric camera might be a stylistic choice for your game. Isometric perspective can make a game look 3D, even if it is 2D. In a way, it adds a sense of depth to your game. Maybe this pseudo-3D style is how you want to present your game.
Because isometric perspective creates an illusion of 3D, there is a developmental reason for using it. In general, it is faster and easier to create 2D assets for a game. 3D modeling is a more complex process that is also more hardware-intensive. Using an isometric perspective, you can create something that looks adequately 3D without having to create 3D models. This can save a developer a lot of time and money, especially in the indie game realm.
The other reason is related to gameplay. Maybe the game you have in mind requires your player to be able to see a lot of information on the screen at once. Overhead perspectives allow for this. This is a big reason why most real-time strategy games use an isometric or rotatable overhead perspective. It allows for the player to see all the enemies and allies on their screen at any given time. It gives them a lot of information about their current situation and allows them to make a more informed tactical decision. It makes it easier to select and move units on the map. Consider the idea of playing a real-time strategy game with a first-person perspective. It would be incredibly difficult for the player to select and move units around the map when they can only see what’s in front of them at any given time.
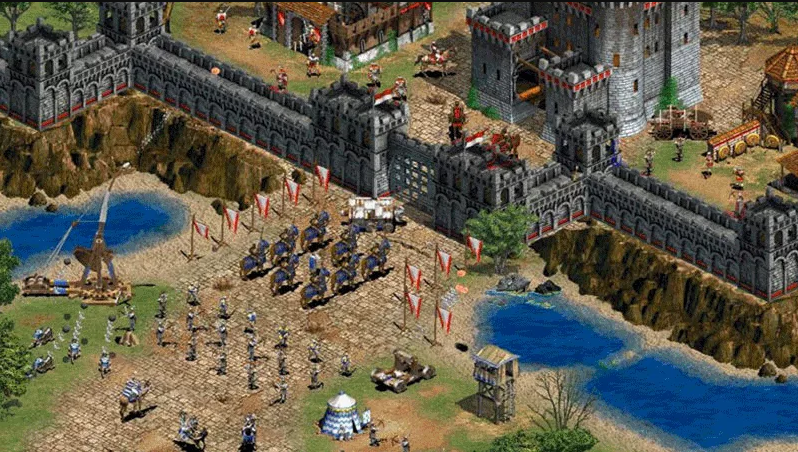

Consider the above image of an older game called “Age of Kings”. You command an army of medieval warriors. With an isometric view, you’re able to select your units easily and send them around the map. Imagine trying to command all these units without an overhead perspective. It would be a nightmare.
The Problem
The 45-degree rotation of the camera causes a bit of trouble for moving a character around the scene properly.
Consider my MS Paint diagram below (player axis excludes y-axis):
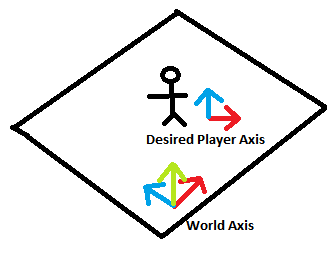

In Unity, when we look at our scene with a 45-degree rotation on the camera’s y-axis, our world axis does not change accordingly. Instead, the world axis keeps the same rotation it always had. Now, look at the desired player axis. Ideally, we would want our D key on our keyboard to move our player directly to the right, based on our perspective as a player. Notice that the player’s desired X-Axis is 45-degrees different than the world X-axis. We want to create a controller that can account for this difference of rotation between the world axis and the player’s axis. Otherwise, if we were to not adjust for this difference, then telling our player to move right would make them follow the world axis, which would make them move up-right from our perspective. Let’s see how we can solve this problem.
Video Tutorial
How to Fix This:
Before proceeding, I want to give a shout out to a user from the Unity3D forums named EvilWarren who largely came up with this solution. I am going to assume that you already know the fundamentals of Unity. Go ahead and create a new Unity 3D project using the 3D settings.
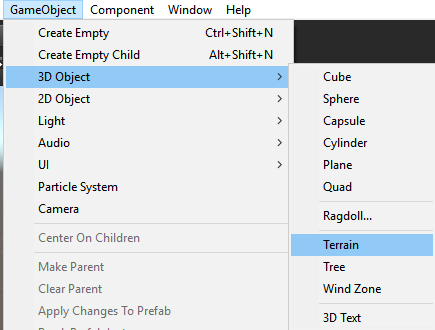
- Create a new Terrain object

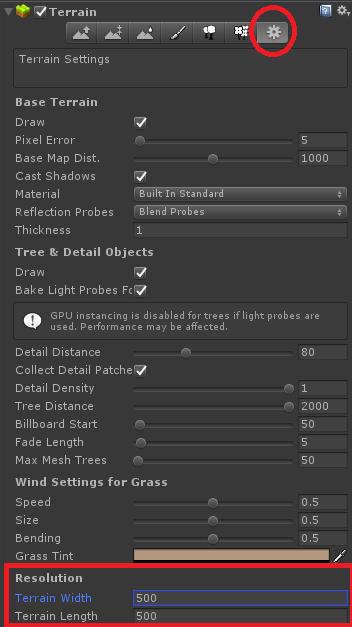
- Modify the terrain settings to that the terrain has a width and length of 50. To do this, click on the terrain and click on the gear icon on the terrain component in the inspector.


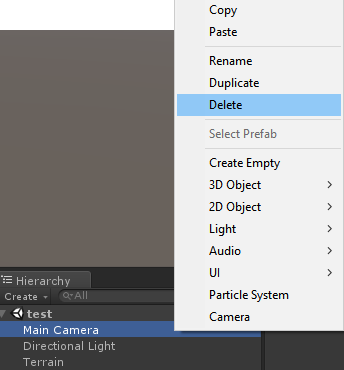
- Delete the main camera from your hierarchy.

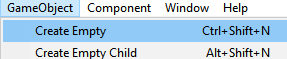
- Create an empty game object and rename it to “CameraTarget”. Set the position to (0, 18, 0) and the rotation to (30, 45, 0). This rotation is what creates the isometric view.


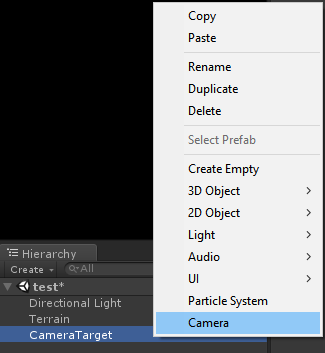
- Right-click on the “CameraTarget” game object in your hierarchy and choose “Camera” from the menu. This will be our new main camera. It must be a child of the CameraTarget object.

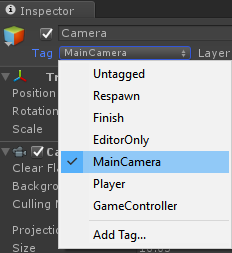
- Change the tag of the new camera to the MainCamera tag.

- Change the projection setting in the camera component to Orthographic. This will make our scene look more 2D instead of 3D. This setting is a stylistic choice. If you prefer the perspective look, then use it.
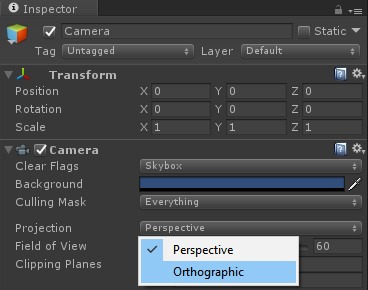

- Change the size of the orthographic camera until you get the desired look you want. The size will change how much of the scene our camera can see.

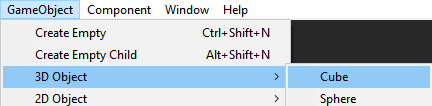
- Now we will create a simple player. Create a Cube Game Object

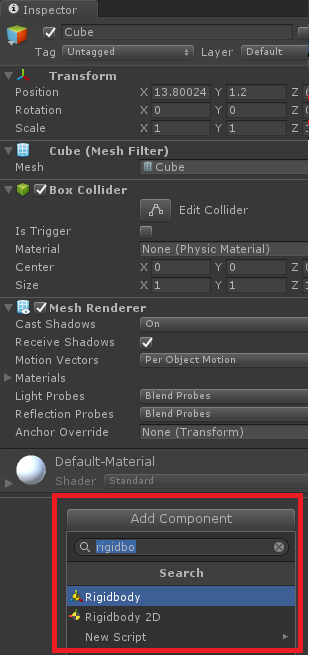
- Add a rigidbody component to the cube

- Before we can create a script, we need to setup our inputs. Go to Edit → Project Settings → Input
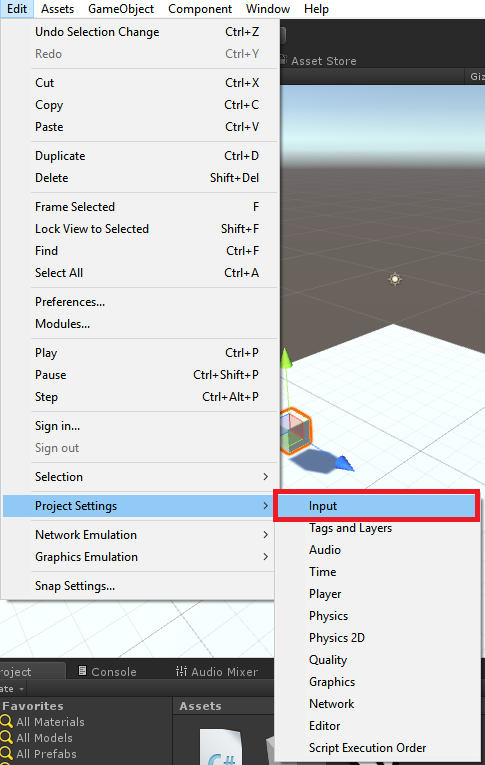

- Change the size of the inputs to 20


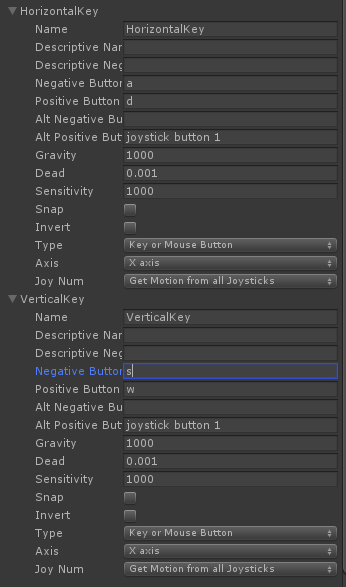
- Expand out the bottom two inputs and set them up according to the following screenshot:

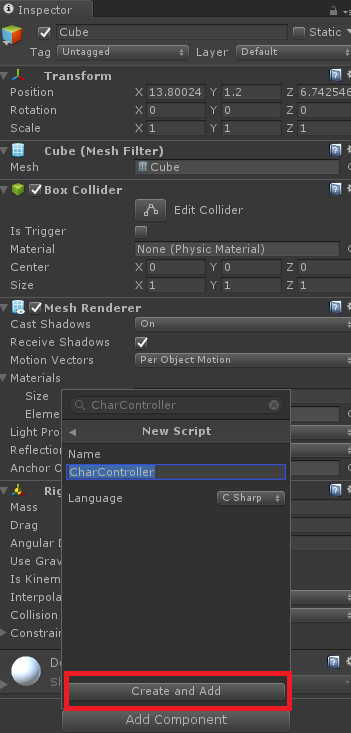
- Click on the Cube in your scene and add a new script component to it. Call the script CharController.

- Replace the code in your script with the following code. The code is commented to help describe the logic.
using System.Collections;public class CharController : MonoBehaviour {
using System.Collections.Generic;
using UnityEngine;[SerializeField]
float moveSpeed = 4f; //Change in inspector to adjust move speedVector3 forward, right; // Keeps track of our relative forward and right vectorsvoid Start()
{
forward = Camera.main.transform.forward; // Set forward to equal the camera's forward vector
forward.y = 0; // make sure y is 0
forward = Vector3.Normalize(forward); // make sure the length of vector is set to a max of 1.0
right = Quaternion.Euler(new Vector3(0, 90, 0)) * forward; // set the right-facing vector to be facing right relative to the camera's forward vector
}void Update()
{
if(Input.anyKey) // only execute if a key is being pressed
Move();
}void Move()
{
Vector3 direction = new Vector3(Input.GetAxis("HorizontalKey"), 0, Input.GetAxis("VerticalKey")); // setup a direction Vector based on keyboard input. GetAxis returns a value between -1.0 and 1.0. If the A key is pressed, GetAxis(HorizontalKey) will return -1.0. If D is pressed, it will return 1.0
Vector3 rightMovement = right * moveSpeed * Time.deltaTime * Input.GetAxis("HorizontalKey"); // Our right movement is based on the right vector, movement speed, and our GetAxis command. We multiply by Time.deltaTime to make the movement smooth.
Vector3 upMovement = forward * moveSpeed * Time.deltaTime * Input.GetAxis("VerticalKey"); // Up movement uses the forward vector, movement speed, and the vertical axis inputs.Vector3 heading = Vector3.Normalize(rightMovement + upMovement); // This creates our new direction. By combining our right and forward movements and normalizing them, we create a new vector that points in the appropriate direction with a length no greater than 1.0transform.forward = heading; // Sets forward direction of our game object to whatever direction we're moving in
transform.position += rightMovement; // move our transform's position right/left
transform.position += upMovement; // Move our transform's position up/down
}
}Vector3 heading = Vector3.Normalize(rightMovement + upMovement); // This creates our new direction. By combining our right and forward movements and normalizing them, we create a new vector that points in the appropriate direction with a length no greater than 1.0transform.forward = heading; // Sets forward direction of our game object to whatever direction we're moving intransform.position += rightMovement; // move our transform's position right/lefttransform.position += upMovement; // Move our transform's position up/down
}
} - At this point, your scene should work. Try running the game and use WASD to move your cube around the map. You will notice your cube rotate in the direction that you would expect the rotation to occur, based on your perspective of the scene.


Conclusion
The history of video games is littered with isometric games. It’s an incredibly common style and it’s important to understand how you can develop a game that has a permanent rotation that you must work with. This tutorial is a simple example that will hopefully help you understand how to move forward with your development. Maybe now you can finish making the gaming world’s next big Action-RPG! Be sure to check out Studica.com for academic discounts on software, electronics, robotics and more. Sign up for Studica’s email newsletter* for even greater savings!
Blogger: Mark Philipp, Application Engineer at Studica
Share this Post