A concept that’s often talked about in software development and game design is User Interface, commonly known as “UI”. A UI is one of the most important features of software because it is the element of your program that the user will usually be interacting with the most. Without a UI, the software would have to be used with nothing but text and command lines. In a video game, a UI makes it easier for you to interpret data (hit points, currency, items), interact with a visual world, or alter video and sound settings, for example.
In this post, we’ll look at how you can use Unity 3D to create a scrolling window and a grid-based layout for UI elements. The goal is to create a window that the user can scroll up and down, which contains a grid layout of a basic image. If you want a more general tutorial about creating UI’s in Unity, refer to my blog post on the basics of creating a UI in Unity 3D.
User Interface Options for Unity
Scrolling Window: A scrolling window is a component that’s built into Unity. It acts as a sort of UI panel that you can store UI elements on and scroll through them using a mouse or touch input. Think of how a website works. You can scroll up or down and reveal more information by doing so. A Scroll View component in Unity is similar.
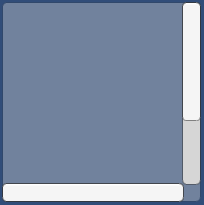
Example of a scroll view
Grid-Based UI: A grid-based UI layout means laying out UI elements in a grid pattern. Unity has a component called a Grid Layout Group that handles grid arrangement of UI elements for you. This is particularly useful for many kinds of games. Many inventory systems will make use of grid patterns of boxes, which contain item icons and information. Many mobile games will organize all sorts of UI elements into grid patterns, which help make it easy for users to find and press the item they need quickly and without confusion.
The Grid Layout Group component can handle grid spacing, grid size, and fixed or dynamic column/row sizes.
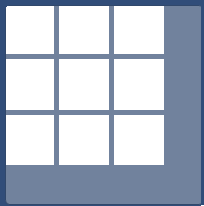
Example of a Grid
Unity UI Video Tutorial
This video tutorial also explains the scroll window and grid layout to help you understand these two user interface options.
How to Create your Unity UI
First, I am going to assume you have a basic understanding of Unity. I will not be covering basic concepts, such as creating a project, adding Game Objects, or how to use the Inspector.
- Start a new Unity Project. The project can be 2D or 3D. You do not need to import any assets unless you want to.
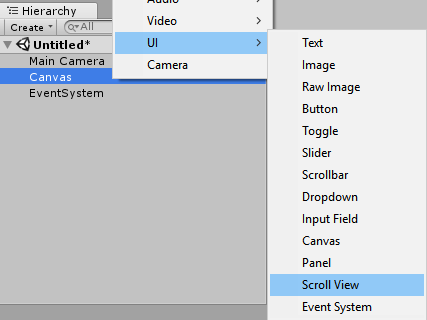
- With your new project open, create a new Canvas object from the Game Object→ UI → Canvas
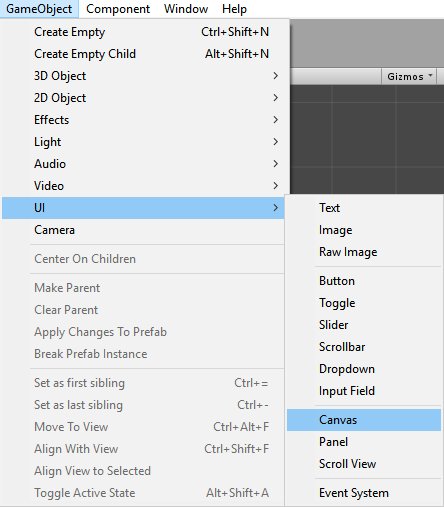
- Right-click on the newly created Canvas in the Hierarchy window and choose UI → Scroll View.
You’ll notice the ScrollView object has a custom Scroll Rect script attached to it with a number of options. If you are curious about the details of these options, refer to the Unity Documentation.
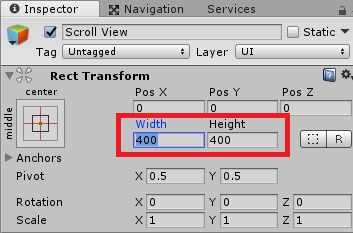
- I am going to resize my ScrollView Rect to be 400×400. Depending on your game’s aspect ratio, you may want to adjust this to your liking.
- Expand the ScrollView hierarchy. Then expand the Viewport hierarchy to reveal the Content object.
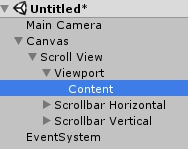
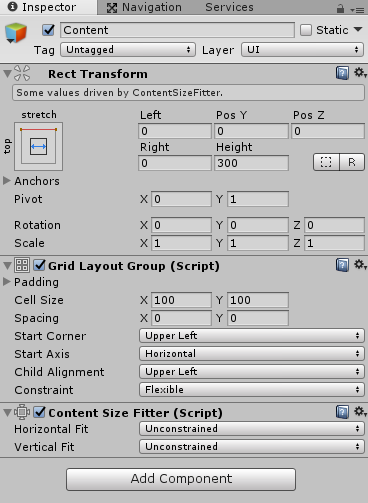
The content object is where we will be attaching our GridLayoutGroup component. The Content object is what the scroll view scrolls through. You can modify the size of this Rect by using the Rect tool to change the width and height. The scroll view works by allowing you to scroll vertically or horizontally in the Content object Rect area, even if that area is larger than the area of the scroll view.
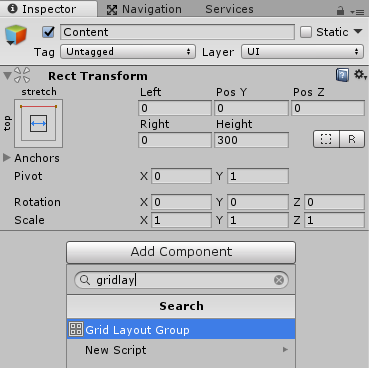
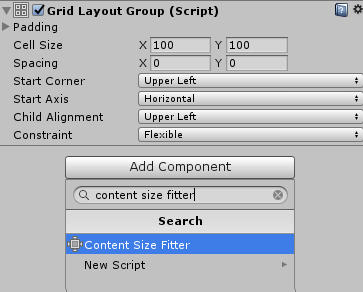
- With the Content object selected, go into the Inspector and click “Add Component”. Type “GridLayoutGroup” and press “ENTER”.
- Add another component to the Content object. In the Add Component window, type “Content Size Fitter” and add the Content Size Fitter component.
Now, your content object should have the following components:
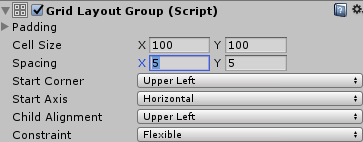
- On the Grid Layout Group script, change the X and Y spacing to 5. Leave the rest of the options the same.
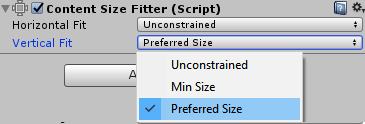
- On the Content Size Fitter, set the “Vertical Fit” option to “Preferred Size”. This will allow the height of our Content Rect to change dynamically if the number of UI elements populating the grid exceeds the current Rect transform’s height boundary. If you want to know more about the Content Size Fitter, refer to Unity’s documentation.
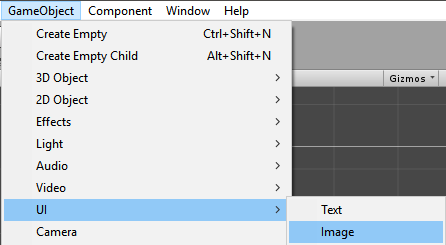
- Now, we want to create a UI image that we can populate our grid with. Go to Game Object → UI → Image.
- We’ll leave the Image settings default. The image will just look like a white rectangle on your screen. Drag and drop the Image object from the hierarchy into your project explorer to create a prefab.
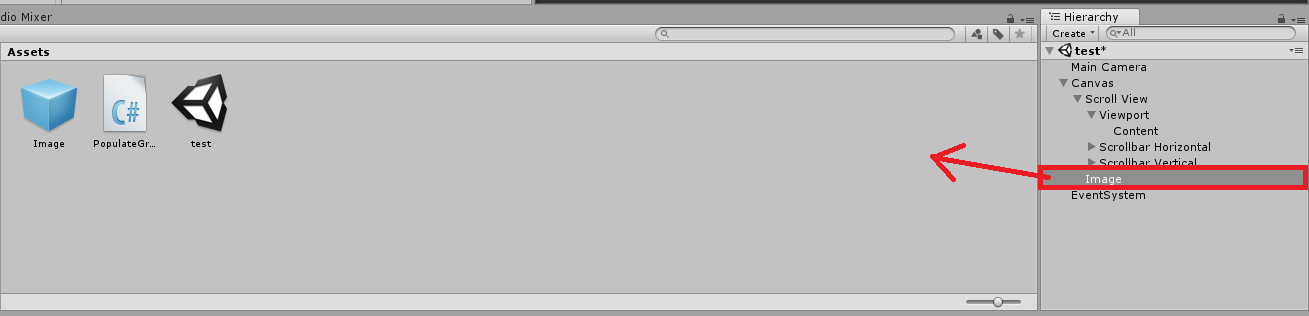
Once you’ve done that, you should see the “Image” prefab listed in the Assets folder of your project explorer. You can delete the Image from the hierarchy window.
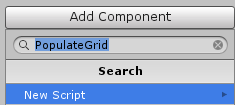
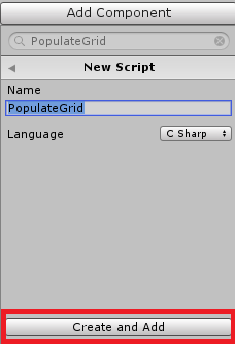
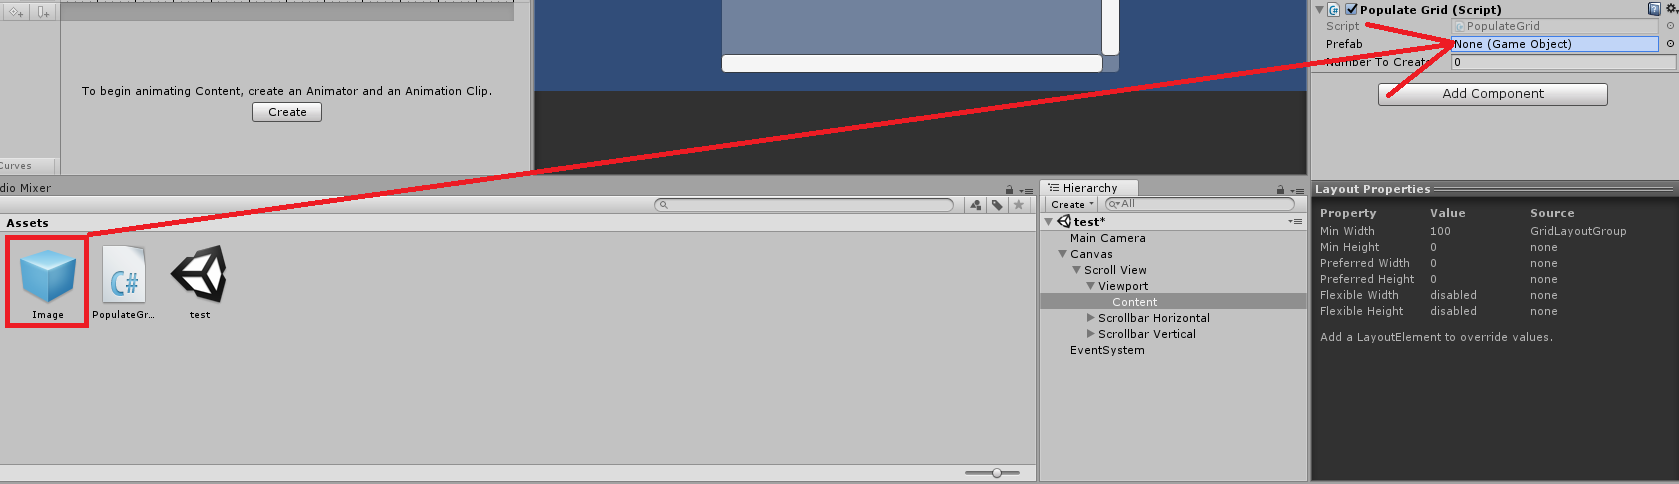
- Now, we want to create a C# script that will handle populating our grid with image prefabs. Click the “Content” object in the hierarchy and choose add component. On the Add Component window, type PopulateGrid and create a new C# script.
- Open the script in your IDE of choice. Copy the following code and paste it:
using System.Collections;
using System.Collections.Generic;
using UnityEngine;
using UnityEngine.UI;

public class PopulateGrid : MonoBehaviour
{
	public GameObject prefab; // This is our prefab object that will be exposed in the inspector

	public int numberToCreate; // number of objects to create. Exposed in inspector

	void Start()
	{
		Populate();
	}

	void Update()
	{

	}

	void Populate()
	{
		GameObject newObj; // Create GameObject instance

		for (int i = 0; i < numberToCreate; i++)
		{
			 // Create new instances of our prefab until we've created as many as we specified
			newObj = (GameObject)Instantiate(prefab, transform);

			// Randomize the color of our image
			newObj.GetComponent().color = Random.ColorHSV();
		}

	}
}
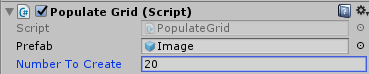
- Save the script and go back into the Editor. Left-click on the Content object and you’ll notice two exposed variables on the PopulateGrid script in the inspector. Drag and drop the Image prefab from the project explorer and put it onto the “Prefab” field of the PopulateGrid script in the inspector. Then, set the number to create to whatever number you want. I’ll do 20.
- Now, if you run your game, you should see your scroll view populate with UI Image items.
Conclusion
This is a very basic implementation of the scroll view and Grid Layout Group components. But hopefully, you see how you can use either of these UI elements for your project. I highly recommend playing around with some of the component settings for both components and see what kind of functionality you can achieve. Have fun!
Be sure to check out Studica.com for academic discounts on software, electronics, robotics and more. Sign up for Studica’s email newsletter* for even greater savings!
Blogger: Mark Philipp, Application Engineer at Studica
Share this Post