Have you ever been working on your game in Unity and wondered how you could create a custom type for a system you were working on? Well, wonder no more! The C# language (and many other languages) have a solution to this problem by using something called an enum. In this blog, we’ll review what enums are and how you can use them. Then we will use enums to dictate some UI input.
What is an Enum?
Simply put, an enum is a custom type that you can create in your scripts. The example Microsoft uses on their documentation is creating an enum for days of the week. So, you create an enum called Days, and there are seven different Days you could use in your program: Sat, Sun, Mon, Tue, Wed, Thur, Fri. You could call on any of these by saying Days.Sat or Days.Mon.
To actually declare the above-mentioned enum, you would do it like this:
enum Days {Sat, Sun, Mon, Tue, Wed, Thu, Fri};
each enum type (E.G: Sat, Sun, Mon) has its own underlying type, which is int by default. So, technically, Sat, Sun, and Mon are values 0, 1, and 2. It is possible to specify the underlying type of the enum, but I won’t be getting into that. Refer to the Microsoft documentation if you’re interested in that.
Why Use an Enum?
This seems unnecessary, why would I use enums? I admit that enums seem rather specific in their use. It can be difficult to see where an enum could be useful in your game. It wasn’t until recently that I actually found myself using an enum to overcome a problem in Unity. For me, the decision to use an enum was made when I realized that the system I wanted to create would have required me to create 5 separate bools to keep track of the state of my script. Obviously, with 5 bools dictating the state of something in my script, my if-statement spaghetti would have been intense, which would likely lead to some odd bugs and behavior that would take more time to troubleshoot. I realized that I could remedy this situation by using an enum to keep track of the states in my script.
Let’s Make Something Using Enums!
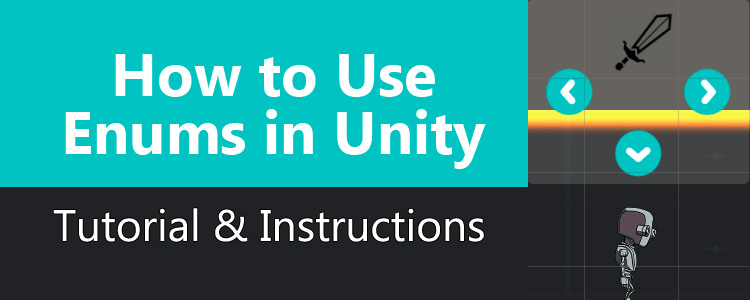
The above-mentioned system I was trying to create was actually quite simple; a UI with four items the user could select using the arrow keys on the keyboard. Each item is either up, down, left, or right on the UI Panel. I wanted it so if the user pressed up, the up item was selected. This selection would be indicated with a fading icon in the up direction.

For example, in the above screenshot, if the user presses the up arrow, the sword icon would fade in and out to indicate it is selected. At this point, if the user presses up again, a command associated with the up button would execute. Otherwise, if the user pressed any of the other arrow keys, then those icons would highlight and be considered the active selection.
Let’s recreate this system right now so you can get an understanding of using enums. First of all, create a new unity project. Let’s make it 2D for simplicity. I’m going to assume you have a general knowledge of Unity so I will not explain certain steps.
- Create a new Canvas object and add a panel to it.
- Resize the Panel however you want, mine looks like this:

- Add 4 buttons to the UI Panel. Rename the objects to Up, Down, Left, and Right. Change the text on each text child to be the same as the name of the parent object. E.G, the Up button’s text should read “Up”.

- Organize the buttons on your panel in such a way that each object is located relative to its name. For instance, the Up button should be in the upper section of the panel.

- Before we create a script, we need to setup our Inputs. Go to Edit › Project Settings › Input.
- In the Input Manager, expand the “Axes” section out and change the “Size” from 18 to 22. On each of the new buttons created, change their names to Up, Down, Left, and Right. For each button, change the “Positive Button” to up, down, left, or right, depending on which input you’re modifying.

You’ll need to do this for each of the buttons. By the end of it you should have an Up, Down, Left, and Right input. Each one should have a positive button that corresponds to its name. This will make our input detect arrow key input on our keyboard.
- Now, click on the Panel item in your hierarchy and add a component to it. Add a C# script and call it SkillInput. Open up this script in the IDE of your choice.
- Copy the following code into your script:
using UnityEngine;
using System.Collections;
using UnityEngine.UI;
public class SkillInput : MonoBehaviour
{
[SerializeField]
float fadeRate = 4f; //Used to adjust image fade speed
enum Selection { None, Up, Down, Left, Right }; //Will be used to keep track of what's selected
Selection currentSel; // Create a Selection object that will be used throughout script
Image imgUp, imgDown, imgLeft, imgRight; //These variables will be used for fading the buttons when selected
Button buttonUp, buttonDown, buttonLeft, buttonRight; //Will be used to invoke Button functions
void Start()
{
currentSel = Selection.None; //assign currentSel to None.
//Grab the Image components of all our buttons
imgUp = transform.FindChild("Up").GetComponent<Image>();
imgDown = transform.FindChild("Down").GetComponent<Image>();
imgLeft = transform.FindChild("Left").GetComponent<Image>();
imgRight = transform.FindChild("Right").GetComponent<Image>();
//Grab the Button components of all our buttons
buttonUp = transform.FindChild("Up").GetComponent<Button>();
buttonDown = transform.FindChild("Down").GetComponent<Button>();
buttonLeft = transform.FindChild("Left").GetComponent<Button>();
buttonRight = transform.FindChild("Right").GetComponent<Button>();
}
void Update()
{
//Standard input calls.
if (Input.GetButtonDown("Up"))
{
if (currentSel == Selection.Up)
{
//Executes if we already have up selected and user presses up again
buttonUp.onClick.Invoke(); //Call up button's OnClick() function
currentSel = Selection.None; //set currentSel back to None
}
else
{
currentSel = Selection.Up; // changes currentSel to Up.
StartCoroutine(FadeIcon(imgUp, currentSel)); //Begins fading the icon
}
}
//The same code pattern from above is repeated for the rest of the inputs
else if (Input.GetButtonDown("Down"))
{
if (currentSel == Selection.Down)
{
buttonDown.onClick.Invoke();
currentSel = Selection.None;
}
else
{
currentSel = Selection.Down;
StartCoroutine(FadeIcon(imgDown, currentSel));
}
}
else if (Input.GetButtonDown("Left"))
{
if (currentSel == Selection.Left)
{
buttonLeft.onClick.Invoke();
currentSel = Selection.None;
}
else
{
currentSel = Selection.Left;
StartCoroutine(FadeIcon(imgLeft, currentSel));
}
}
else if (Input.GetButtonDown("Right"))
{
if (currentSel == Selection.Right)
{
buttonRight.onClick.Invoke();
currentSel = Selection.None;
}
else
{
currentSel = Selection.Right;
StartCoroutine(FadeIcon(imgRight, currentSel));
}
}
}
IEnumerator FadeIcon(Image img, Selection sel)
{
//basic Fade Coroutine. For more Information:
//https://blog.studica.com/create-a-fading-splash-screen-using-coroutines-in-unity-3d
float alpha = 1f;
while (currentSel == sel)
{
while (img.color.a > 0)
{
alpha -= Time.deltaTime * fadeRate;
img.color = new Color(img.color.r, img.color.g, img.color.b, alpha);
yield return null;
}
while (img.color.a < 1)
{
alpha += Time.deltaTime * fadeRate;
img.color = new Color(img.color.r, img.color.g, img.color.b, alpha);
yield return null;
}
yield return null;
}
img.color = new Color(img.color.r, img.color.g, img.color.b, 1f);
}
}
- Now, we need to setup some OnClick functionality for our buttons. First thing’s first, create a new C# Script called “TestMessage”. Open up the script and copy this code into it:
using UnityEngine;
using System.Collections;
public class TestMessage : MonoBehaviour {
void Start ()
{
}
void Update ()
{
}
public void Testing()
{
Debug.Log("Test Succeeded!");
}
}
- Now, create an empty GameObject in your scene and attach the TestMessage script to it.
- Go to each button and, in the OnClick section, click the + icon to add a new OnClick functionality. In the OnClick() list, drag and drop the new GameObject into the section that says None (Object)

- Then, click the “No Function” drop down and choose TestMessage › Testing()

This ensures that the button will call our “Testing” function when it’s invoked.
- Do this for each button you have.
- Now, try playing your scene and press your arrow keys. You should notice the images fading when you press their corresponding arrow key. If you have an image selected, such as the Up image, and you press the up arrow again, the Testing function should run and you’ll notice a message in your console saying “Test Succeeded!”.
Conclusion
Hopefully, this exercise demonstrates how enums can be useful. Imagine what this system would look like if you had used bools instead of an enum to try and dictate what object is selected at any given time. It would get ugly really quick. The if statements would become very long and confusing. You would be setting bools to true and false all over the place. By doing it this way, you’re able to keep track of your selection in a very clear and concise way. The naming of the enum is straightforward and you are controlling your selection with a single variable.
In the end, it’s important to understand how enums fit into your programming toolbox. While you won’t use them extensively, they can be incredibly useful in solving certain problems, such as the one covered in this blog. So, while you may not use enums in every script you write, I can guarantee you will come across a few problems that will best be handled by using them.
Blogger: Mark Philipp, Application Engineer at Studica
Share this Post