If you are seeking an exciting way to engage your students in STEM and mobile robotics, the STEM BOT Pro Kit from Studica Robotics is the perfect solution. This handy guide will outline how to build a robot. We will create a pushbot robot using the STEM BOT Pro Kit. This pushbot will be 17″ long, 14.5″ wide, with a height of 7″ constructed from high-quality, structurally sound, and safe parts. This kit offers a hands-on experience that brings the possibilities of STEM to life. You can also access our detailed STEM BOT Pro Kit Build Guide or follow along with the complete build guide video on YouTube.
How to Build a Robot
 The STEM BOT Pro Kit is designed to provide students with a comprehensive introduction to robotics. The project covers various stages of assembly and programming, making it an ideal educational tool. The stages of creating the robot include:
- Frame Assembly
- Back Wheels Assembly
- Front Wheels & Battery Mount Assembly
- Base Plate & Electronics Assembly
- Wiring Guide
Available at Studica Robotics, this kit includes all the necessary components and detailed instructions to build your robot. View the complete STEM BOT Parts List. Our STEM BOT Build Guide also provides helpful information to help you set up software for programming and tips for programming your STEM BOT robot.
 Materials Needed
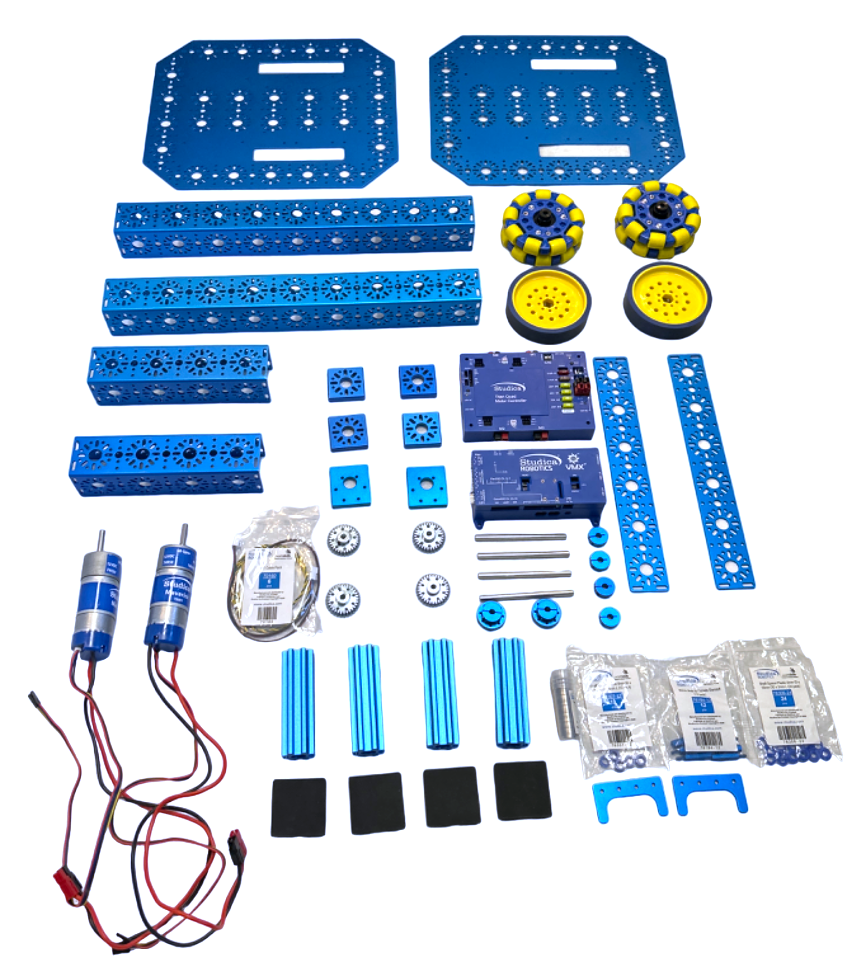
All the materials needed to build this pushbot robot are included in the STEM BOT Pro Kit from Studica Robotics. The included channel components are durable 3mm thick 6061-T6 aluminum that has been deburred, anodized, and polished for strength and safety. This build requires electronics including the VMX Robotics Controller and the Titan Quad Motor Controller as well as a combination of structure components, motion components, and hardware. Review the complete list of parts needed. 3D CAD files for all parts are available at www.studica.com/studica-robotics-resources.
STEM BOT Build Instructions
Here is a summary of the steps needed to complete this pushbot robot build. (You can also view detailed, step-by-step building instructions with visual reference here.)
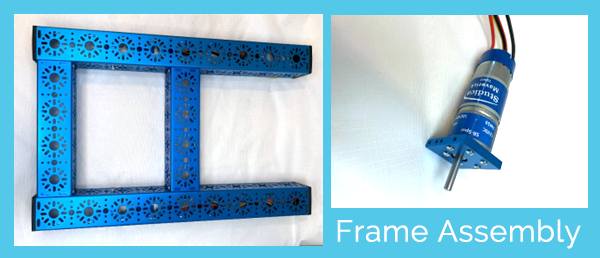
Assemble your Frame
To assemble your frame, you will attach the end piece plates to the U-Channels and add the bumpers. You will then attach the Maverick DC motor to the mount plates. Then you attach the gear to the shaft of the motor. Need help? View build video.
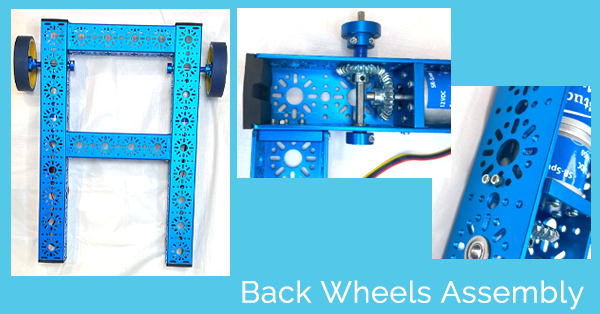
Assemble the Back Wheels
Attach the motors to the frame by recessing them into the 432 mm U-Channels. Then, place the 14mm bearings on the 14mm hole patterns that are perpendicular to the ends of the Maverick motor’s shaft. Do this on both sides. Insert the D-Shaft through the bearings and the 30 Tooth bevel gear. Be sure that the gears mesh well with each other. Then tighten the gears to the shafts. On the end of the D-shaft attach the D-shaft collar clamp with a 1mm shaft spacer in between the collar and bearing. Place two shaft spacers and then one clamping shaft onto the D-Shaft and secure. Attach the 100m drive wheels to the clamping shaft hubs. Refer to the step-by-step instructions.
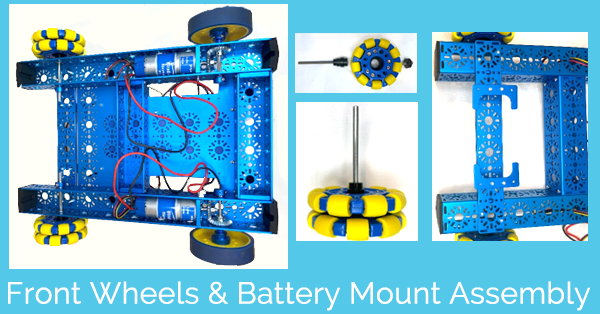
Assemble Front Wheels and Battery Mount
Stack two 288mm x 40mm flat brackets on top of each other and attach them to the frame. Attach two male to female standoffs to each battery clip. Secure the battery clips to the flat brackets. The front wheels are Omni wheels. Each wheel comes with its shaft hub. Attach the D-shaft into the shaft hub and tightened. Then, screw the hub into the Omni wheel. Complete this step for both wheels. Now place two OD Bearings on each side of the hole patterns on the U-Channels. Insert the Omni wheel shafts through the bearings. Attach the collar clamp on the opposite end of the D-shaft. View more detailed instructions.
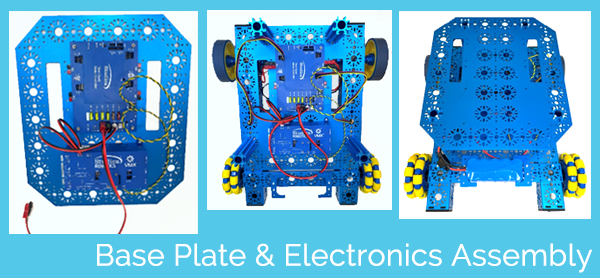
Assemble Base Plate and Electronics
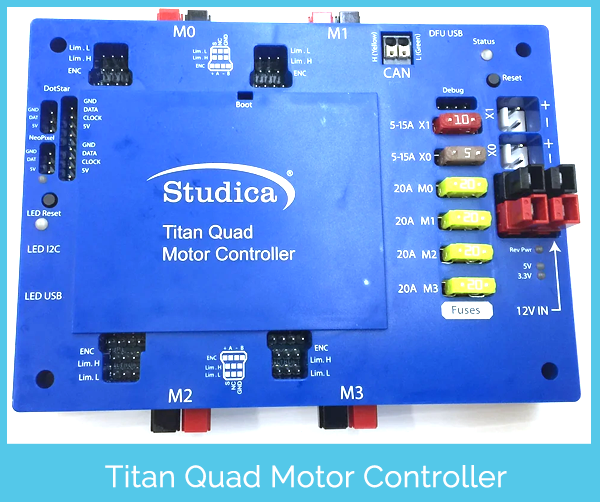
Secure the Titan Quad Motor Controller to the base plate. Then, secure the VMX Robotics Controller to the same base plate.
Before you go any further, please review the Wiring Guide (below) carefully. It will help you with this part of the assembly.
Align the base plate so that the Titan is at the back of the robot frame, with the holes matching up with the 192mm and 432mm U-Channels. Once everything is lined up, secure the base plate to the frame and motor mount plate. Now, attach the base plate to the frame of the robot using extrusions and cap screws. Attach another base plate to the extrusions.
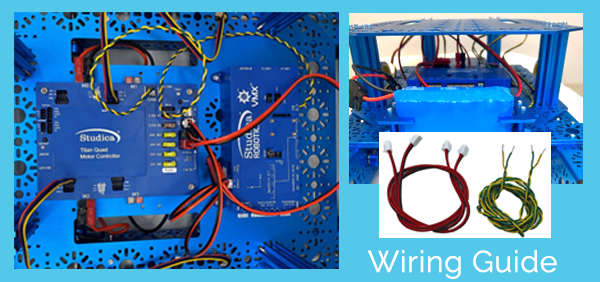
Wiring Guide
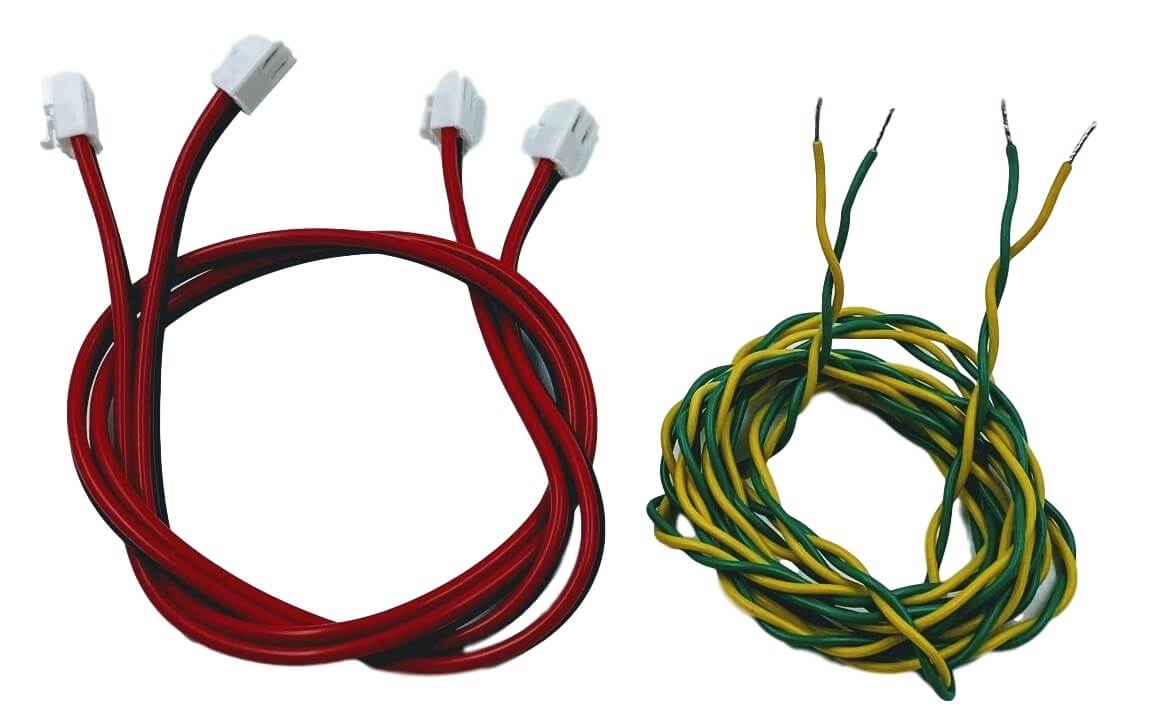
Titan Wire Pack
The Titan Wire Pack includes the necessary cables to power the VMX and enable communication between the Titan and VMX using a CAN (Control Area Network) Bus Cable (Green Low, Yellow High). Before we get started, let’s take a closer look and the VMX Robotics Controller and the Titan Quad Motor Controller.
The VMX Robotics Controller is the “brain” of the robot, running on Linux and compatible with Java, C++, Python, LabVIEW, and ROS. Integrated with the NavX-IMU and paired with the Titan Quad Motor Controller, it supports both tele-operated and autonomous controls, providing advanced movement capabilities.
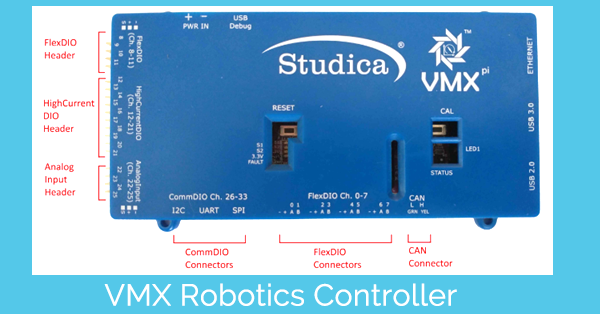
The Titan Quad Motor Controller is a 4-channel CAN-based motor controller. When used with the VMX, the Titan serves as the robot’s Power Distribution Panel (PDP), mainly supporting the VMX.
- Connect the power cable from the Titan’s power output port to the VMX’s power port.
- Connect the Powerpole 45 extension cable to the Titan’s power input port.
- Connect the green cable to the Titan’s Green (L) port and the VMX’s L (GRN) port. Connect the yellow cable to the Titan’s Yellow (H) port and the VMX’s H (YEL) port.
- Connect the Left Motor and Encoder cables to the M0 port. Then, connect the Right Motor and Encoder cables to the M2 port.
- Place the battery between the battery clips and connect it to the Powerpole 45 Extension Cable.
In summary, this STEM BOT robot build project is an excellent introduction to the world of robotics in STEM education. Required materials are included in the STEM BOT Pro Kit from Studica Robotics. Watch the video tutorial. View the detailed building guide here or view it as a PDF.
Share this Post